Belina PayrollHR has four integrated modules:
|
Module
|
Comment
|
1.
|
Payroll
|
Payroll computations of basic pay, overtime, shorttime, PAYE and net pay. Includes payslips, transfers to banks, leave and loan processing.
|
2.
|
Human Resources
|
There are two versions of HR module. The 'Central' version comes bundled with the payroll module and has basic HR functionality including document handling, additional records in the Employee Master, the processing of Disciplinary, Tools and Equipment and Clothing Transactions. The 'Inspire' version is a separate add-on module which includes Assessments, Recruitment, Staff Training, Discipline, Document handling and Organizational Charting.
|
3.
|
Time Control
|
Biometric Time Control software with automatic computation of normal time, overtime and shorttime in accordance with organizational rules. Links to a variety of biometric terminal types.
|
4.
|
Connect
|
Allows staff to apply for Overtime, Leave, Loans, Advances, make limited Employee Master changes, make Suggestions going through a structured approval process with communication throughout.
|
 Getting Around Getting Around
To move from one module to another click on one of the three buttons continually displayed in the top right hand corner of the screen, as shown:
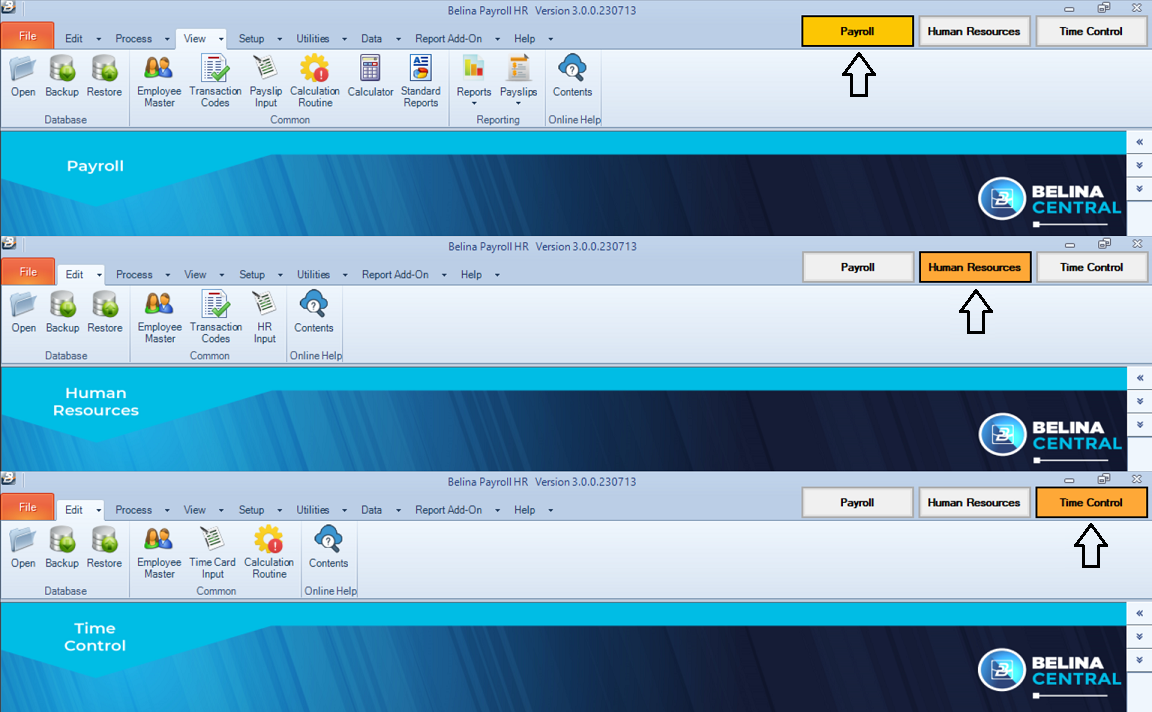
The Module currently active is indicated by the orange coloured selection button. The main menu options in each module are consistent to ensure a familiar environment. The 'Ribbon' below the main menu options contains icons suited to the menu option selected.
Belina PayrollHR can be used without using the mouse. These keyboard conventions will assist you to do so.
Insert, Change, Delete and Close
Every table listing in Belina PayrollHR has four buttons on the screen to 'Insert' (add), 'Change' and 'Delete' an entry on that list or 'Close' the table:

Tab Key
|
Press the Tab key to move the cursor to the next field
|
Shift/ Tab keys
|
Press Shift/ Tab to move back to the previous field
|
Escape key
|
Press Esc to close the window without saving
|
Payroll Icon Bar
|
The icon bar allows the User to move to different areas of the program quickly and easily.
|

|
Ellipsis button - displays a table showing available entries. It also allows for the Insertion, Deletion and Changing of entries on the table
|

|
Drop list box - press the down-arrow button to see, and select, a list of pre-determined options
|

|
Spin box - scroll up or down in dates or values to select
|

|
Check box - to check the box click with the mouse whilst pointing in the field . Alternatively
|

|
Radio button - select one mutually exclusive option
|

|
Scroll bar - allows the User to scroll up and down or left or right across a table
|
Highlighted fields
|
If a field is highlighted press any key to delete the contents of the field. To amend the field remove the highlight by pressing an arrow key on the keyboard. Moving from field to field with the Tab key highlights the contents of each field.
|
Menu options - Alt/*
|
Menu options often have one letter underlined. To select the option without using the mouse press the Alt key and the underlined letter.
|
Enter
|
Pressing the 'Enter' accepts the screen that is being worked on.
|
CTRL and ENTER
|
Pressing Ctrl and Enter is the equivalent of pressing the 'OK' button to accept the screen and move onto the next.
|
Search Function
|
To assist Users in locating records on tables Belina PayrollHR has a search facility. Press the first, or first few characters, to have the cursor immediately find the entry required. Press 'Enter' to select the entry.
|
Sort Order
|
Use the drop down menu to change the sort order on a table listing. Belina PayrollHR will remember the preference and use it as the default when that user next comes to this table.
|
'Options' -
|
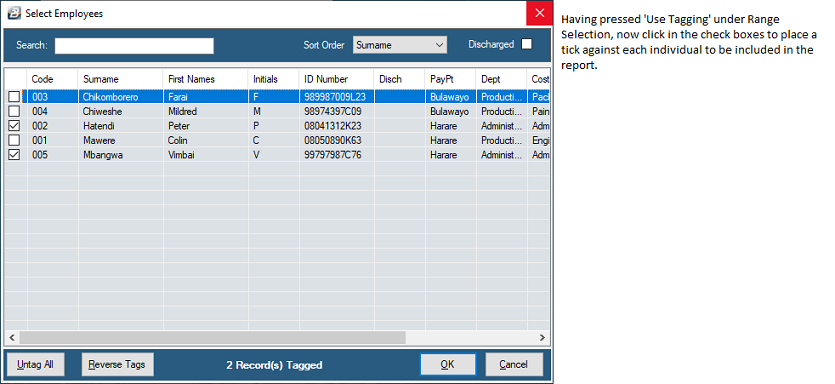
When processing Bulk transactions into the payroll, or extracting a report, it is possible to select the range of employees required by pressing the 'Options' button. First there is range selection by Period. Then range selection by any of the groupings, illustrated below. Selections can be by code or number using tagging as the method of selection
|
Range Selection

Tagging
|
Payroll - File Menu
The File Menu is where you to Open, Create or Delete payrolls, backup and restore data.
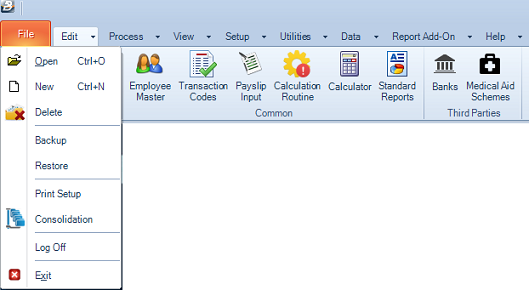
Belina PayrollHR allows you to create any number of separate payrolls
•executive salaries payroll, •general salaries payroll, •wages payroll, and •contract payroll
Menu Option
|
Use
|
Open
|
Open a payroll. Highlight the payroll required and press Enter or press the 'Select' button to open the payroll.
|
New
|
Create a new payroll.
|
Delete
|
Delete an existing payroll. Care should be taken with this menu option to ensure that reports have been filed and backups of data are maintained if there is any possibility that information from the payroll may be needed in the future.
|
Backup
|
Backup the data in the payroll that is currently open
|
Restore
|
Restore data from a backup back into the payroll that is currently open.
|
Print Setup
|
Setup the default printer for the payroll.
|
Consolidation
|
Produce reports and bank transfers including data from more than one payroll.
|
Exit
|
Exit the payroll.
|
|
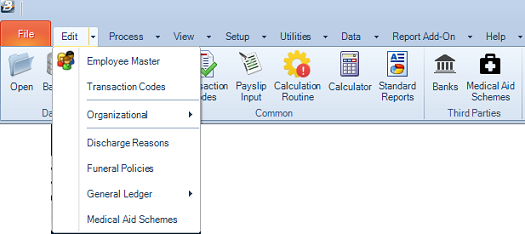
Payroll - Edit Menu
The Edit menu is where you create, change or delete the structural components of the payroll, including employee details, departments, Cost Centres and Paypoints
|
Menu Option
|
Use
|
Employee Master
|
Enter Employee personal and work details.
|
Transaction Codes
|
Used to process different types of payroll transaction to employees.
|
Departments
|
Setup department groups to assist in processing and reporting
|
Cost Centres
|
Setup Cost Centres to assist in processing and reporting. Allocate costs to a cost centre or job.
|
Pay Points
|
Setup Paypoints to group employees for processing and control into physical locations in the organization
|
Medical Aid Schemes
|
Setup the different Medical Aid Companies and their schemes
|
Internal Grades
|
Setup the Internal Grade structure within the organization to assist in processing and reporting
|
NEC Grades
|
Setup the NEC grade structure for your industry/ ies to assist in processing and reporting
|
General Ledger
|
Setup the General Ledger Codes used in your accounting to facilitate journal reports and exports of data.
|
Banks
|
Setup the Banks and their Branches used for bank transfers.
|
Occupations
|
Setup the Occupations used on the ITF16 report
|
Positions
|
Setup the Positions in the organization, used in the organogram.
|
Industries
|
Setup the different industries with their respective working hours
|
Discharge Reasons
|
Setup the various reasons why an employee would leave the organization
|
|
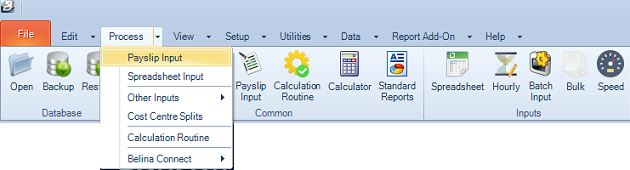
Payroll - Process Menu
The Payroll menu is where you process transactions on the payroll.
Menu Option
|
Use
|
Payslip Input
|
Process and view transactions processed for an employee. Shows all the transactions for the period including PAYE and Net Paid.
|
Spreadsheet Input
|
Process transactions to employees using a spreadsheet interface
|
Batch Input
|
Process transactions to employees in batches, with, or without, batch control totals.
|
Bulk Input
|
Process transactions to employees in bulk
|
Hourly Input
|
Process time worked
|
Speed Input
|
Loop through a selected group of transactions, as you process, one employee at a time entering values.
|
Cost Centre Splits
|
Split overhead costs across Cost Centres.
|
Calculation Routine
|
Goes through the payroll doing all the calculations for each employee including PAYE and Net Paid. It accrues leave for the period when it is run the first time in a new period.
|
|
Payroll - View Menu
The View menu is where you view, print or export various reports. The number of reports is extensive and their titles explain their content

|
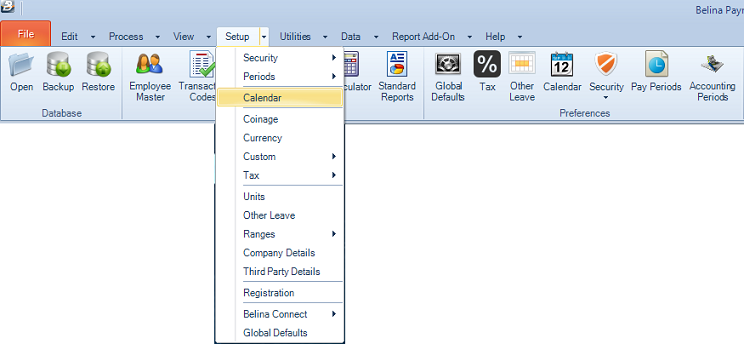
Payroll - Setup Menu
The Setup menu is where you set-up parameters, within which the payroll should operate.
Menu Option
|
Use
|
Security
|
Setup and refine limits to the access a User has to Payrolls, menu options, transactions and employee master fields.
|
Periods
|
Setup the pay periods that will be paid to employees. Period information determines the hourly and daily rate of pay.
|
Calendar
|
Setup public holiday and significant dates in the organizational calendar.
|
Coinage
|
Setup the types of currency denomination that will be paid to employees if being paid in cash. Also used to round up the net pay amount to the nearest denomination.
|
Currency
|
Setup the currencies and exchange rates that are to be applied in the payroll.
|
Custom
|
Setup the custom layout for cheques and payslips
|
Tax
|
View, enter or change current and future tax parameters
|
Units
|
View, enter or change unit descriptions used to process transactions with a unit value
|
Other Leave
|
Setup the other leave types and the rules that apply to each of them.
|
Ranges
|
Setup age and wage rate ranges for statistical and other reporting
|
Company Details
|
Setup address and bank details of the organization used on various reports and in automated payments made by the system.
|
Third Party Details
|
Setup third party bank and address details for those organizations being paid through the system.
|
Registration
|
Enter the Belina software registration details to activate the user licence purchased.
|
Connect Module
|
Setup the connection parameters to have the payroll link to the online Connect module. Also setup the Transaction Code parameters to the approved applications coming from the Connect Module
|
Global Defaults
|
Setup the Global default values that will come automatically when processing.
|
|
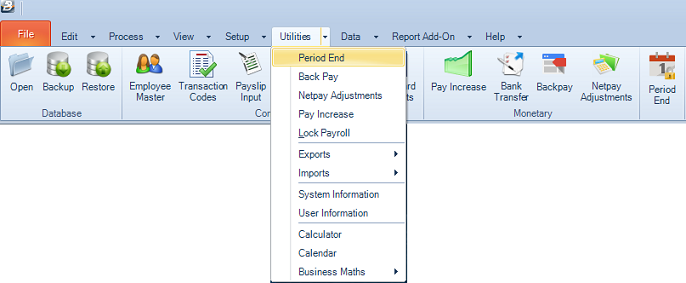
Utilities Menu
The Utilities menu is where you find various tools that assist your payroll processing, when needed.
Menu Option
|
Use
|
Period End
|
Close the current payroll period and take the payroll to the next payroll period.
|
Backpay
|
Use the Backpay module to automatically calculate the value of a backpay for a selection of Transaction Codes for a group of employees.
|
Netpay Adjustments
|
Netpay Adjustments are used where a payroll run has been paid but
|
Pay Increase
|
Use the Pay Increase module to automatically calculate revised rates of pay for a selected group of employees. The pay increase could be calculated as a percentage or amount and be based on Employee Master rates of pay or grade rates.
|
Lock Payroll
|
Use this facility to lock the payroll from further processing. This is particularly important in a networked environment where one user may be adding or changing records when another User as assumed that processing is complete and is finalizing the payroll for payment.
|
Exports
|
Use this option to Export payroll data, accounting, cash book, third party and EDI Bank Tranfer data from the payroll,
|
Imports
|
Use this option to import Employee Master record details from Excel, medical, leave and time management data into the payroll.
|
System Information
|
There are two tabs, the first 'Belina Payroll' tab shows the payroll registration details for the payroll. The second tab is the 'Windows' tab which shows details about the computer environment in which the payroll is being run including Windows version, SQL version, memory availability and usage as well as hard disk space.
|
Calculator
|
A standard calculator is available at any time whilst processing with or without a transaction tape. Select specialist calculators and do conversions of imperial to metric measurements using the menu provided.
|
Calendar
|
When processing transactions
|
Business Maths
|
This menu option brings up an 'Interest Calculation' and 'Loan Amortization' which is useful to enter what-if scenarios.
|
|
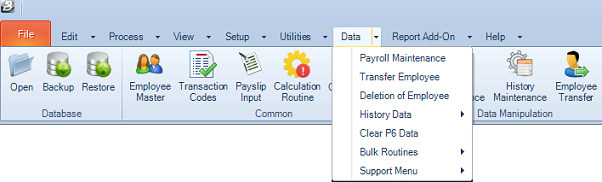
Payroll - Data Menu
The Data menu is where you go to manipulate and handle data in the payroll.
|
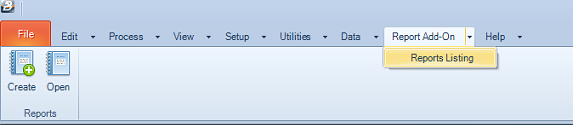
Payroll - Custom Reports
The Report Designer menu is where you go to use or create a custom report.
|
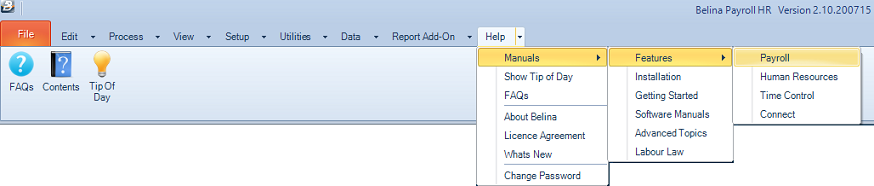
Payroll - Help menu
The Help menu is where you access various help facilities, including the help and manual and FAQ's.
|
|