When the power is connected to the terminal and the On button pressed:
The system takes a short time to boot up. The screen displays the Belina Logo, which can come in various forms:
•Press the Menu Key to display the terminal Main Menu, as shown:
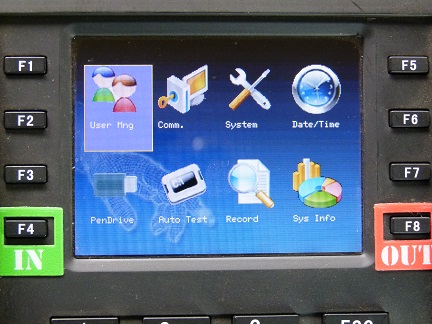
User Management (Employee Clock User Management): Use this menu option to Insert, Change or Delete a Users’ basic information, including : •User ID (Unique number used to identify the Employee on the Terminal) •Name of the Employee •Fingerprint Capture •Card (proximity card allocation) •Password (allows the Employee to use the terminal without using a fingerprint or proximity card), and •Privileges (determine whether the Employee has Administrator or just User access to the terminal features) Also used for Work Codes and card management. |
|
Connections: Set up communication parameters between the terminal and Belina Time Control software. This would involve setting up the mode of communication e.g. ethernet or Wifi. When setting up the communication use this menu to enter: •IP address, •Gateway, •Subnet mask, •Baud Rate, •Device Number, •Communications password. |
|
Manage Data and set the System Parameters, which includes: •Fingerprint thresholds (the sensitivity of the reader) •Date format •Terminal Sounds and Notifications •Algorithm for the Fingerprint Storage •Function Keys (keyboard) •Display parameters, •Bell control •Data Management •Clock Reset •Terminal update (update the software) |
|
the Device Date/ Time should set accurately to ensure the correct recording of attendance times. |
|
Use a USB, or Pen Drive, to: •Download attendance log •Download Users from the Terminal •Download SMS's and Employee photographs •Upload User Information •Upload SMS's •Upload Employee photographs.
Use the USB to tranfer information and attendance data from one terminal to another. |
|
Test if each terminal function is working correctly e.g. •Keyboard test •Audio test •Sensor test •TFT test •RTC test |
|
View attendance log records from the terminal. |
|
Display of: •Number of records held on the terminal •Space available for records and data •Device name and serial number, •Device MAC address (Media Access Control) •Firmware version and build. |