It is good practice to process the time cards the day after the clocking day so that there is no backlog of transactions to process. It is also good practice to keep adjustments to a minimum by ensuring good clocking discipline amongst those using the clocks.
Adjusting Clockings
Processing by Date highlights any gaps in transactions. It highlights if, for example, an employee has failed to log in or out.
To process transactions on the Time Card:
Go to the ‘Process’, ‘Time Card Input’ and then ‘By Date’ menu options.

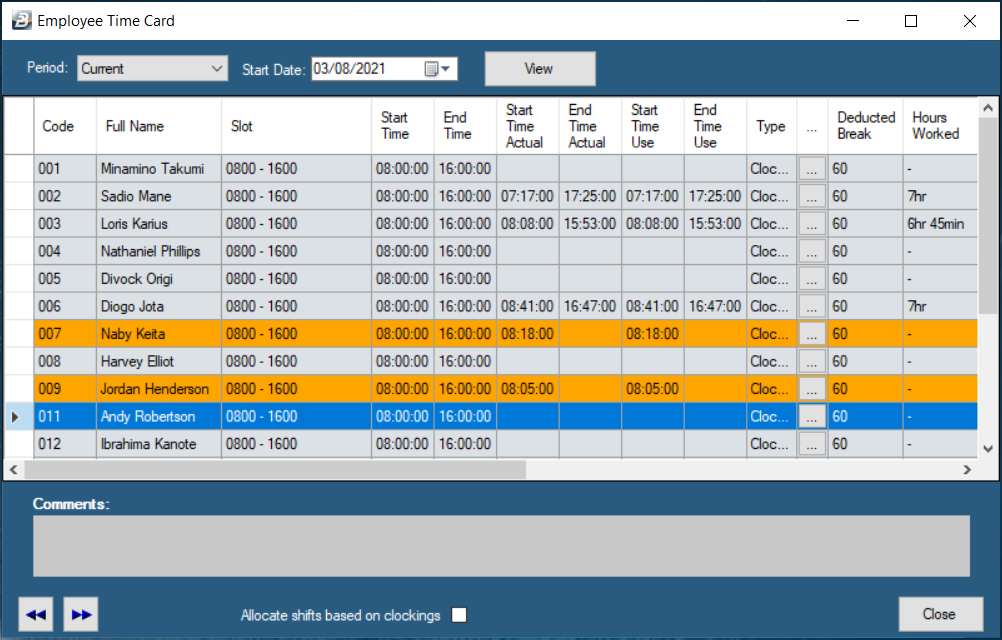
Use the ‘Start date’ calendar to select the date being processed, then press ‘View’.
Each line on the table is the time record for an individual. Go across the line checking details. If a clocking is incomplete with either a Clocking In or a Clock Out missing then the line will be displayed in an orange colour.
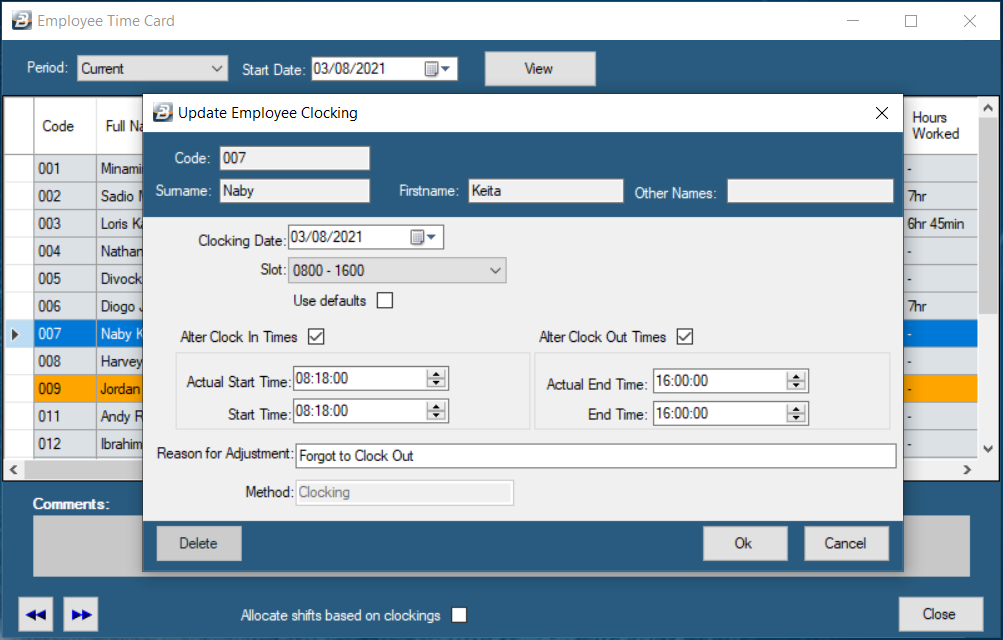
To correct a missing Clocking In or a Clock Out press the first Elipsis button on the row (to the left of ‘Deducted Break’) and enter the times manually. If necessary you can change the ‘Slot’ and alter the Clocking In or a Clock Out times.
To change a Clocking In time enter the ‘Actual Start Time’ and ‘Start Time’ using the same value eg. If the employee clocked in at 08:10 then enter that value in the two fields. The same would apply to Clocking Out. Enter a ‘Reason for Adjustment’ for audit trail. The audit trail automatically notes the User that processed each adjustment and what was adjusted.
Press ‘OK’ to save the adjustment and close the screen.
Repeat the process for each employee.
Adjusting Overtime – Post Authorised
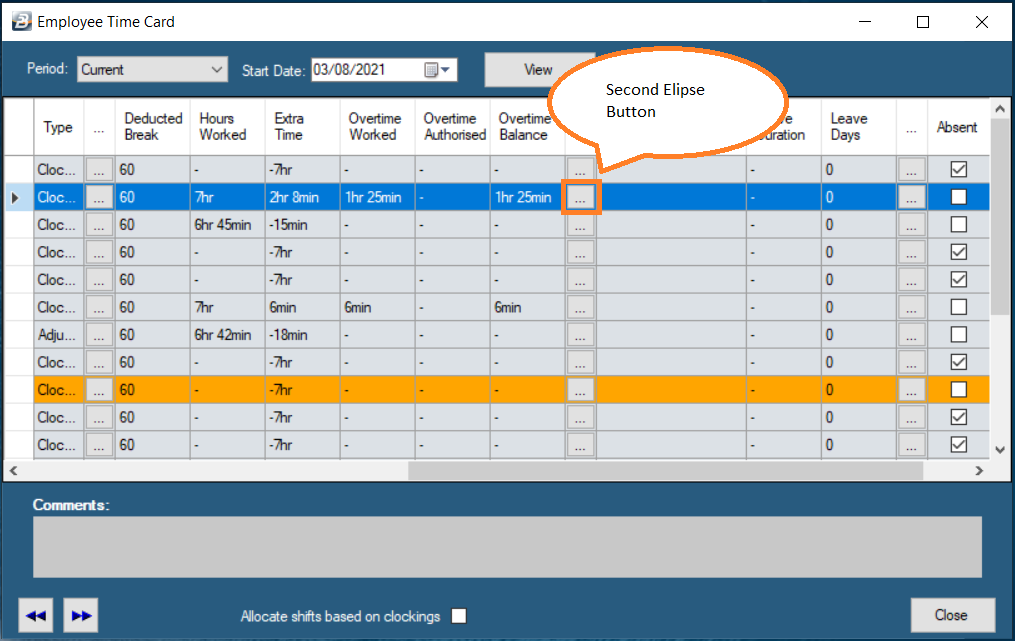
To adjust overtime use the second Elipsis button on the row (to the left of ‘Leave Type)
•before the overtime is worked (Pre Authorised), or
•after the overtime is worked (Post Authorised).
Where employees have to work a standard number of normal time hours before overtime becomes payable then these ranges can be setup. The supervisor authorises the first. The system then can determine whether the hours worked are eligible for overtime and which rate should be applied.
At this point we focus on overtime that has already been worked.
The times coming through against ‘Post Authorised Duration’ represent hours beyond the normal shift clocking hours. Change the times recorded to the actual overtime hours to be paid. The adjustment can only reduce the number of hours. The change in the number of hours is reflected on the ‘Time Card’ as unauthorised and not paid.
This may not be worked hours and may need adjustment to take into account, for example, time spent washing up in the washrooms before leaving the premises.
As a result, some clients that position the clocks outside the immediate work areas rather than at the entrance to the premises to give a more accurate time of when the person clocks out from actual work. This would mean that the employee clockings are not affected by time spent in the washroom.
When complete press ‘OK’ to save.
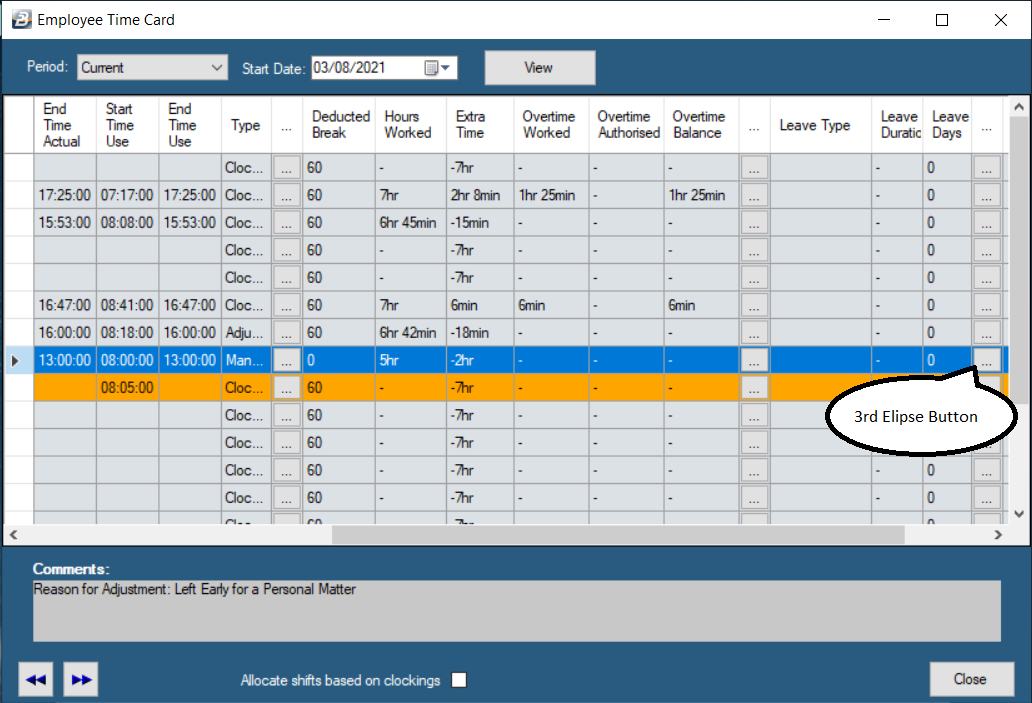
To convert overtime to leave use the third Elipsis button on the row (to the left of ‘Absent’).
This can happen in various circumstances. One example could be where an employee has gone off the premises to do personal tasks. The time spent away can be deducted as leave rather than deducted as shorttime. The time that is away is computed as a fraction of the shift. If the person was away for 2 hours of a 6 hour shift then the fraction would be 2/6 would be 1/3 or 0.333 of a day.
Select the ‘Leave Source’. This could be from ‘Normal Leave’ or from the ‘Leave Bank’.
Leave Bank - represents an accumulation of overtime hours that an employee can take off at a later date instead of that time being paid out as overtime or added to the ‘Normal Leave’ balance.
When complete press ‘OK’ to save.