Printing Payslips
To print payslips:
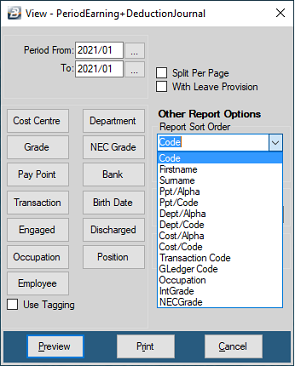
•Go the the 'View', 'Payslips', then 'Payslip Print' menu options •Select the payslip 'Period' •Enter the 'Payslip Date'. This could be the cut-off date that is applied for overtime and other transactions for the period, or could be the actual date that the employees receive the payments. •Select the 'Payslip Format' to be used in the printing of the payslips •Enter any range selections that there may be to print payslips for selected individuals •Make any other selections that may be required, when complete •Press 'Print'
Emailing Payslips
To email and to send payslips to employees - See Further Topics - 'Emailing Payslips'. This describes the setup of the emailing function
In Summary:
•Go the the 'View', 'Payslips', then 'Payslip Print' menu options •Select the payslip 'Period' •Enter the 'Payslip Date'. This could be the cut-off date that is applied for overtime and other transactions for the period, or could be the actual date that the employees receive the payments. •Select the 'Payslip Format' to be used in the printing of the payslips •Enter any range selections that there may be to selectively send the payslips to targeted individuals •Make any other selections that may be required, when complete •Press 'Email' •An email will be sent to each of the employees with their own individual payslip. The payslip is password protected to prevent unauthorized access to the information.

In the example, above, notice that a warning message highlights the fact that one of the employees does not have an email address. If appropriate this can be resolved before the payslips are emailed.
|


 .
.