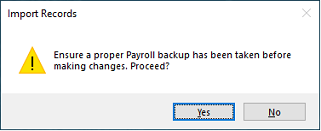
We advise that an interim backup is taken before doing any of the following process. This precaution will enable the system to be put back into the position it was in before undertaking the procedure. This would be done by restoring the backup
Export leave records from Time Control Module
To import leave records into the Payroll Module from the Time Control Module first generate the leave export from the Time Control Module. To do this:
•Open the Time Control Module
•Select the 'Utilities', 'Export Data' and 'Leave Records' menu options
•Select the date range to be included in the export and any other filters that you may require
•View the selected records displayed, if satisfied press 'Export'
•The saved file is called 'BelinaLeaveRecordsImport'
•Use this file for the import into the payroll module
Create an import file
•The first column must be the employee codes
•The subsequent columns can be in any order, they are assigned when the import is done
•The top row may have column headings. These are useful, but not essential
Example - Leave export - Time Control

Example - Leave days for import

Import leave records from spreadsheet
•Select the 'Utilities', 'Imports' and 'Leave Records' menu options
•A backup warning displays. Press 'Yes' to continue if a backup has been done or is not required. Otherwise stop and do a backup and proceed after it has been done.
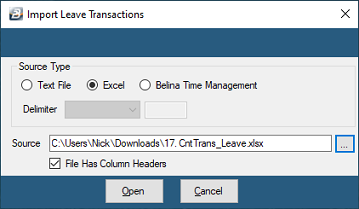
•Select the Type of file being imported. In our case it is an Excel File
•Press 'Open', this opens up the file and shows the data in spreadsheet format for checking.
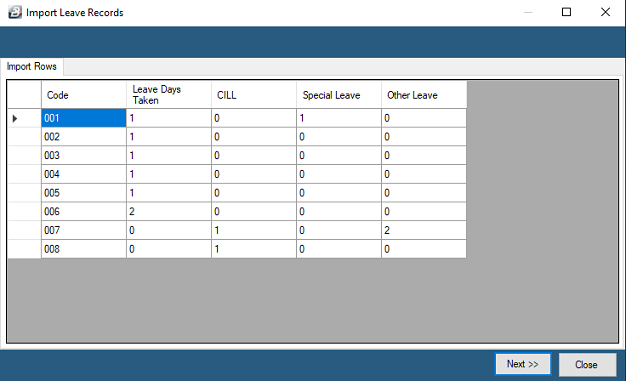
•Press 'Next>>'
•Click on one of the Import fields listed on the left hand side of the screen and 'Assign' it to corresponding Payroll Transaction Code on the right hand side of the screen by double-clicking the Transaction Description or by ticking the checkbox and pressing 'Assign'. Do this for all the records being imported. It is essential to assign the employee code since this is the primary key.
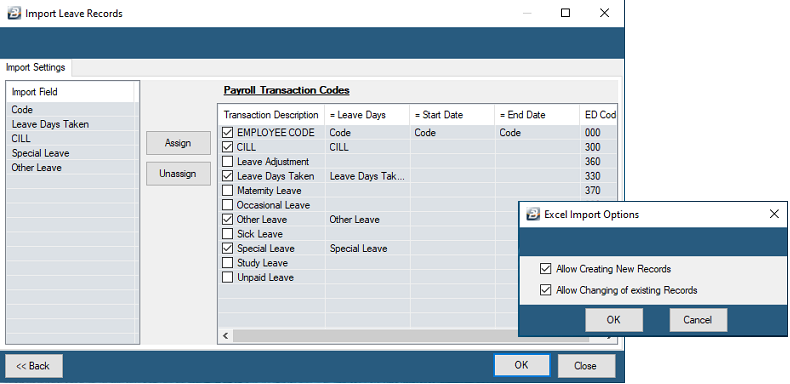
•After assigning the records press 'OK'
•An 'Excel Import Options' screen displays, which requests user permission to 'Create New Records' and/ or to 'Allow Changing of existing Records'. Make the necessary selections
•Press 'Ok' to import the spreadsheet transactions.
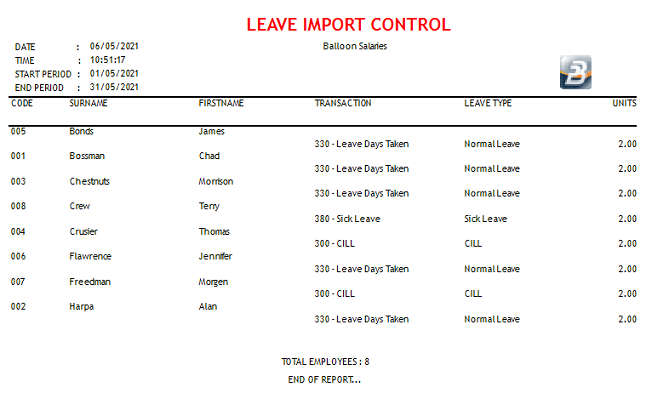
•A control report is automatically generated so that you can check that the import brought through the records as expected.
