We now need to setup the clock/s that you have chosen to use. You need to speak to someone responsible for your computer network to allocate a static IP address for the clock.
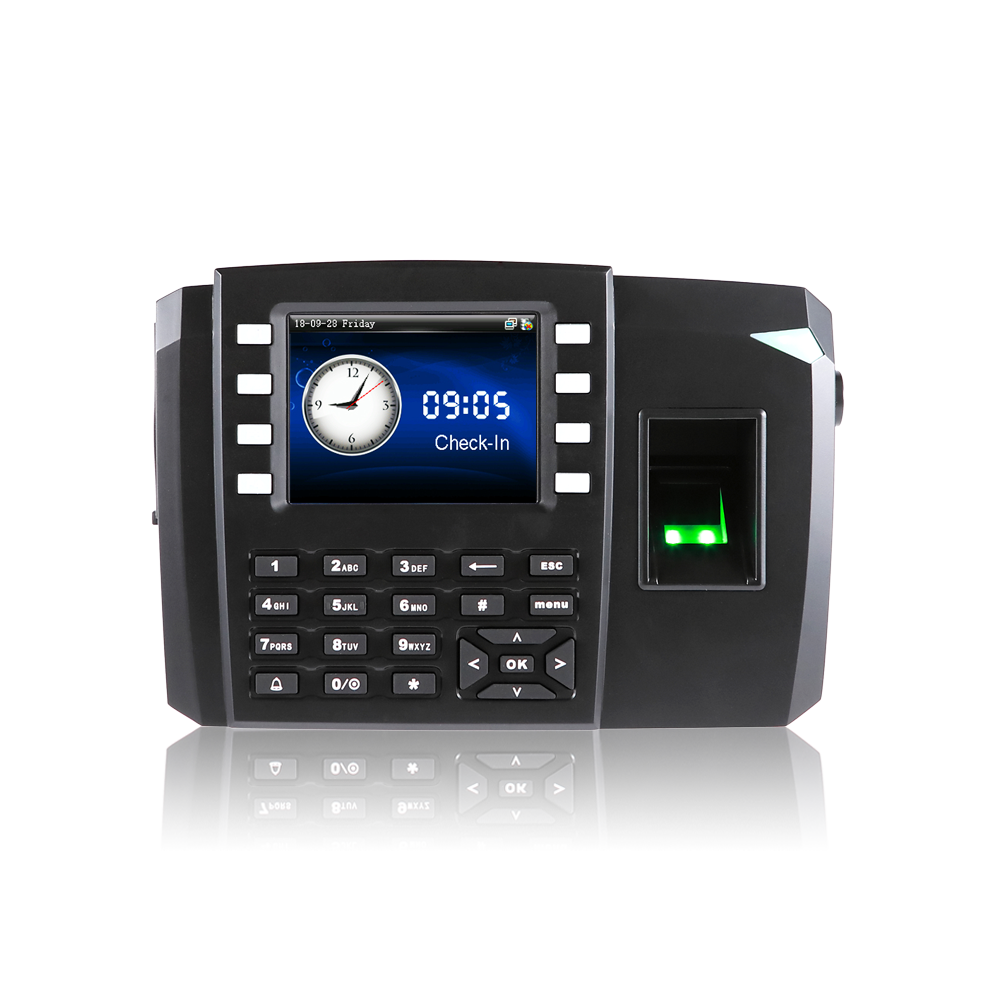
These are two of the clock models currently available:
TFT500
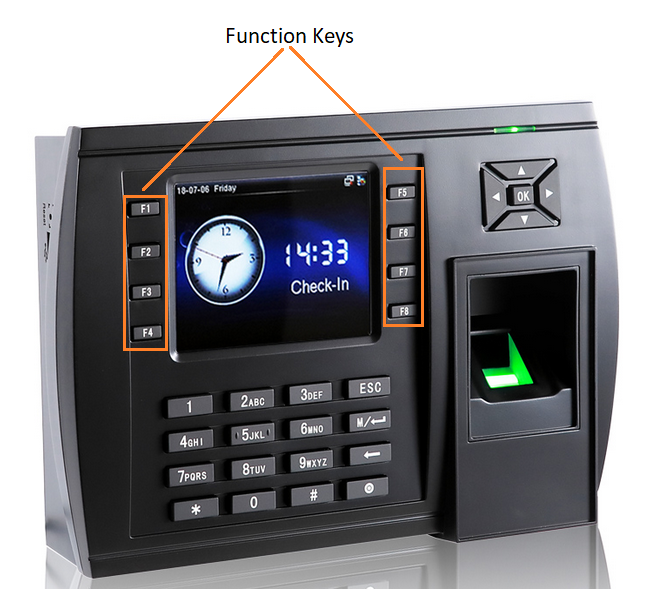
TFT600
To Setup the IP Address on the Clock
We will start by entering the network setting on the clock. To do this:
Press the ‘Menu’ button on the clock to bring out the Menu Screen.
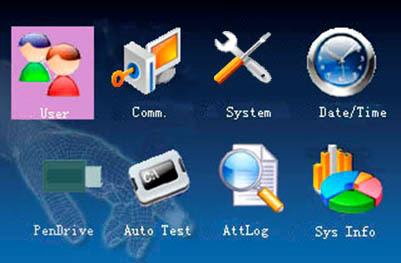
Then select the ‘Comm.’ Option using the arrow keys on the keypad. Press the ‘OK’ button to select.
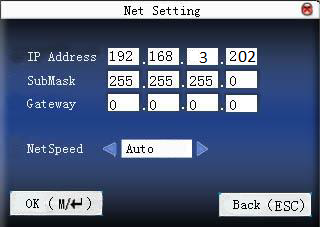
Then select ‘Network’

Type in the IP settings for the clock. Sometimes it may not be necessary to type in the gateway settings depending on how your network is structured. Please Click ‘Ok’ to save the settings when you are done
To setup the Clock in Belina Time Control
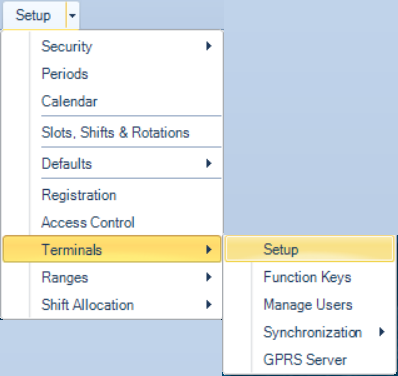
To do this go to the 'Setup', then 'Terminals' menu options:
You are presented with a blank table:
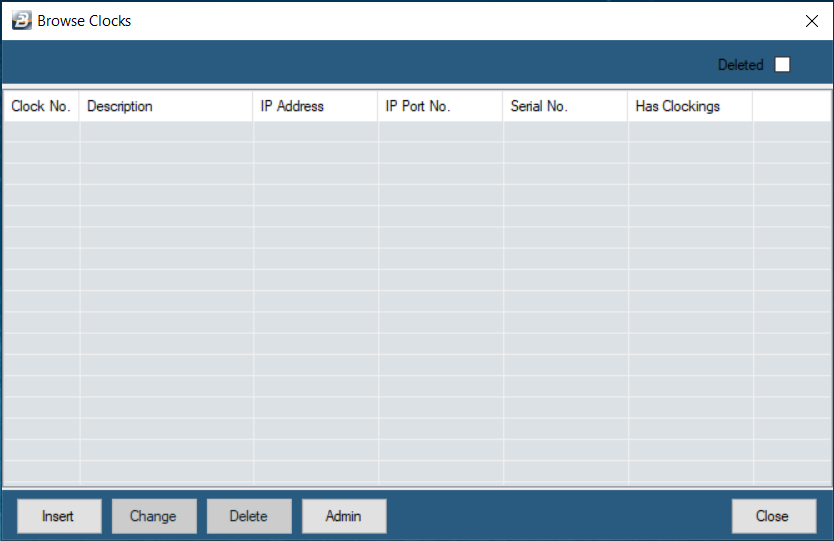
Click ‘Insert’ to enter the Clock’s settings:
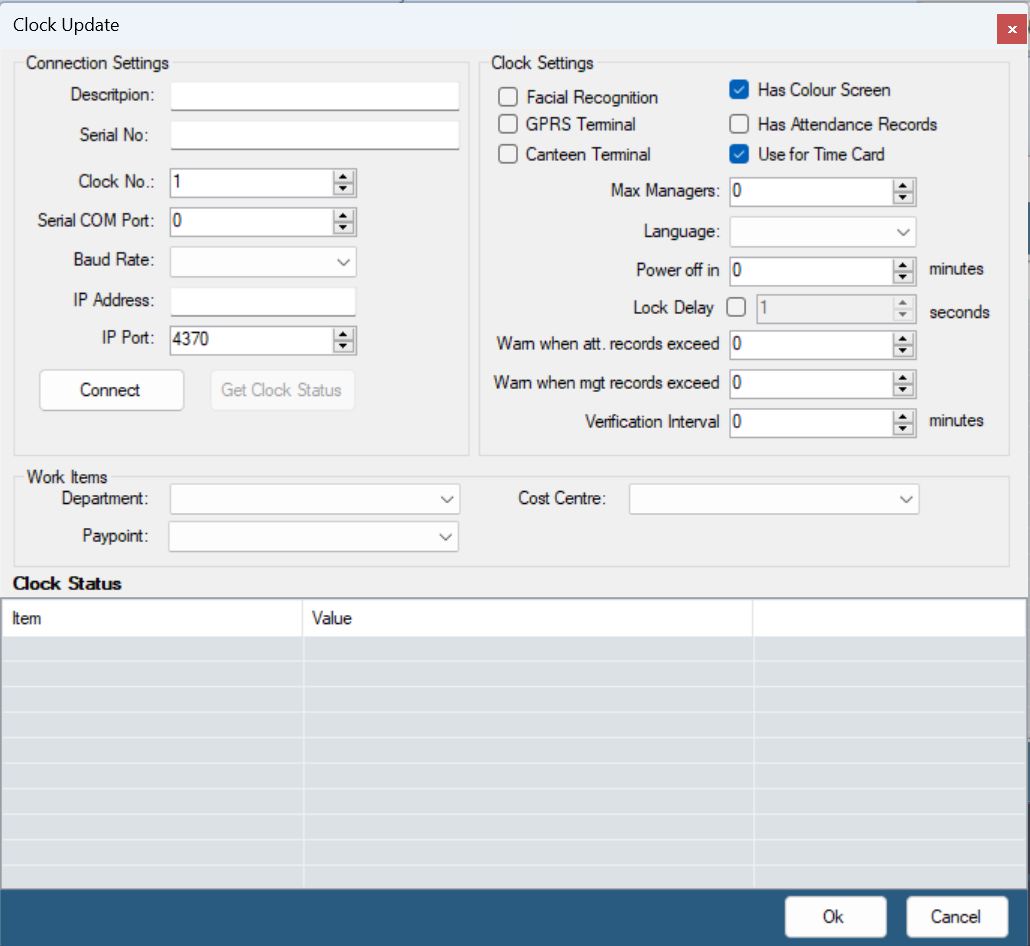
Description |
The name of the place where the clock is located. |
IP Address |
Type in the static IP address of the clock. The DHCP issued IP address should not be used. |
The other fields can be left blank since they will be auto-populated in the next step.
Click the ‘Connect’ button, half way down the screen. If a valid connection is made with the terminal then the 'Connect' button will change to 'Disconnect'. Once the connection is made press the ‘Get Clock Status’ button to retrieve the clock status details, see picture below.
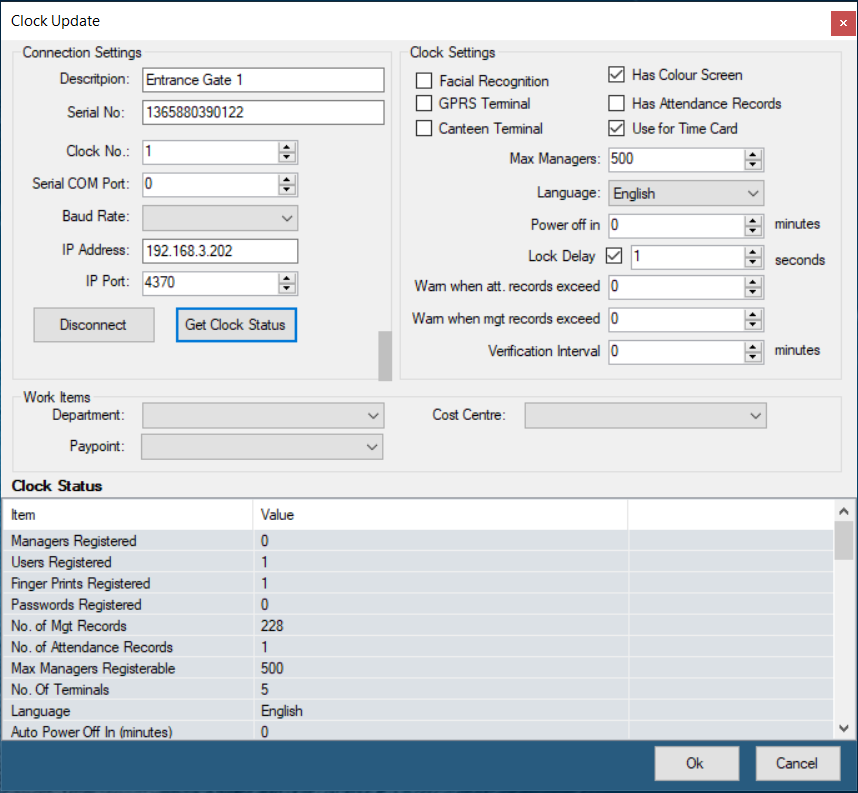
Once the terminal is connected the following screen displays, notice the bottom section of the screen where it shows the 'Clock Status'.
Description |
Enter the Description of the terminal (often this would be the location of the terminal) |
Serial Number |
The serial number of the terminal. |
Clock No |
Enter the number of terminals in numerical sequence |
Serial COM Port |
If the terminal is connected to the computer using serial cable, and not ethernet, select Serial Com Port. (Serial Communication Port). The port number allocated should be inserted. |
Baud Rate |
Use the drop-down menu to select the speed at which data is to be communicated to and from the terminal. Lower speeds should be selected where communication signal strengths are not strong. The baud rates available are: 9600, 19200, 38400,57600 and 115200 |
IP Address |
Internet Protocol address (IP address) is a numerical label assigned to each device to enable communication. There are normally 4 sets of numbers separated by a period (.). The first three sets of numbers are network specific to your individual network. The last set are the range to select from. It is important to allocate a number that has not already been used in the range 0 - 255. |
IP Port |
The default number that comes with the terminal is '4370' for all types of terminals. This number comes as default into the software and does not need to be typed in (system generated). |
Facial Recognition |
Place a tick in the Check-box if the particular terminal is a Facial Recognition terminal. Facial recognition terminals have additional technical requirements that need to be activated by this check-box. |
Has Colour Screen |
Place a tick in the Check-box if the particular terminal has a colour screen. Terminals that have colour screens have more technical requirement than monochrome screens which needs to be activated by this check-box. |
GPRS Terminal |
Specifies if the terminal has mobile connection capabilities through the mobile network using a data enabled SIM card. |
Has Attendance Records |
Some terminals are being exclusively used for Access Control and are not Time and Attendance data. If the terminal is being used for access control the data would irrelevant to Time and Attendance and would distort the proper Time and Attendance data. The data, is therefore, not downloaded into the Time and Attendance part of the program if the checkbox is not checked. |
Canteen Terminal |
Place a tick if the terminal will be used in the canteen to manage meal ticketing. The terminal then becomes a dedicated meal ticketing device that cannot be used for time and attendance functions. |
Use for Time Card |
Place a tick if times recorded on the terminal will come through onto the Time Card. |
Max Managers |
Set the maximum number of Administrators that can be setup on the terminal. |
Set the language for the voice recordings. It is possible to have all the pre-recorded messages that are associated with clockings come through in 3 different languages, English, Shona and Ndebele. |
|
Power Off In |
Set the number of minutes in which time the terminal will turn off. This option is particularly useful in situations where power supply is limited. |
Lock Delay |
Tick the check box if the terminal is being used for Access Control then enter the number of seconds that the relay will remain open when an accepted entry is made. |
Warn when att. records exceed |
A warning can be displayed if the terminal data exceeds the specified number of attendance transactions. When data is transferred the transactions stay on the terminal until terminal data is 'Cleared' from the log in a separate procedure. If too much data remains on the terminal then it slows down the automatic upload or download of clockings. |
Warn when mgt. records exceed |
A warning can be displayed if the terminal data exceeds the specified number of management records. |
Verification Interval |
Enter the verification interval - to ensure that a clocking is recorded once as a person places their finger on the scanner. Enter the time, during which a duplicate entry will not be recorded. effective value is 0~60 minutes. |
Work Items - Department |
For on-site presence reports. The terminal is allocated to the selected department. Employees clocking with this terminal will be shown as present in this department regardless of the department allocated to them in their employee master record. This feature is especially useful where employees move from one department to another. This also useful in determining time spent in each department over a period of time. |
Work Items - Paypoint |
For on-site presence reports. The terminal is allocated to the selected paypoint. Employees clocking with this terminal will be shown as present in this paypoint regardless of the paypoint allocated to them in their employee master record. This feature is especially useful where employees move from one paypoint to another. This also useful in determining time spent in each paypoint over a period of time. |
Work Items - Cost Centre |
For on-site presence reports. The terminal is allocated to the selected Cost Centre. Employees clocking with this terminal will be shown as present in this Cost Centre regardless of the Cost Centre allocated to them in their employee master record. This feature is especially useful where employees move from one Cost Centre to another. This also useful in determining time spent in each Cost Centre over a period of time.. |
Clock Status |
Details regarded the Clock status when the 'Connect', then 'Get Clock Status' buttons are pressed |
Connect |
Once all the parameters on the screen have been entered test the connection to the terminal by pressing this 'Connect' button. Once communication is established another button displays 'Get Clock Status' by pressing this button obtain a full listing the terminal settings can be seen and confirms that the terminal has received the software settings entered.
|
Once the form has auto-populated click ‘OK’.
Click ‘Yes’ to restart the clock.
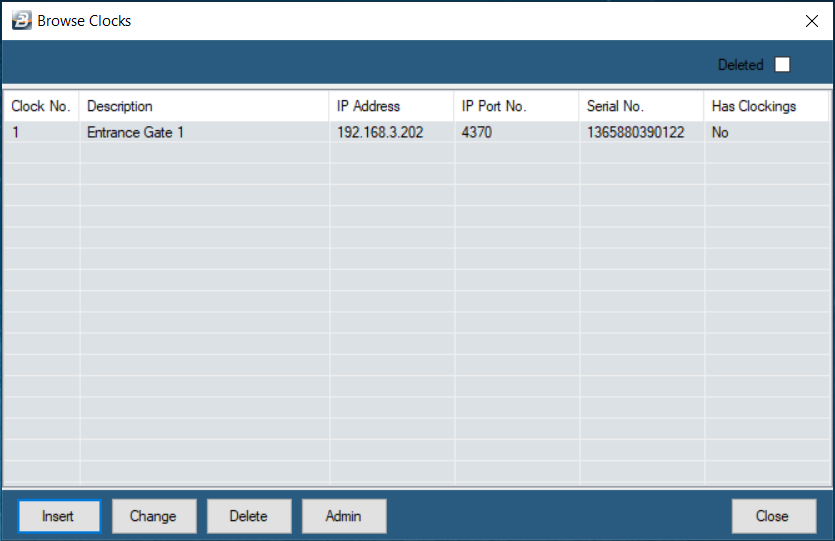
Click 'Close' and proceed.