In every organization there are employees that work a different shift pattern. One may work 5 days a week from 08:00am to 5:00pm with an hour for lunch but another may work mornings only. There are normally quite a number of shift patterns in any organization, each are setup using 'Slots', 'Shifts' and 'Rotations'. Each day worked is a Shift. That shift is made up of time Slots. The Shifts are then strung together into a Rotation. 'Slots' and 'Shifts' are used to setup a particular workday schedule and 'Rotations' string these workdays into a rotation (normally a weekly work pattern).
Example
An organization has three groups of employees Factory, Security and Administration.
:
Factory
Week
|
Rotation 1
|
Rotation 2
|
Rotation 3
|
|
1
|
6:00am - 2:00pm
|
2:00pm - 10:00pm
|
10:00pm - 6:00am
|
|
2
|
10:00pm - 6:00am
|
6:00am - 2:00pm
|
2:00pm - 10:00pm
|
|
3
|
2:00pm - 10:00pm
|
10:00pm - 6:00am
|
6:00am - 2:00pm
|
|
Security
Description
|
Days
|
Times
|
Day Shift
|
Monday - Sunday
|
06:00am - 6:00pm
|
Night Shift
|
Monday - Sunday
|
06:00pm - 6:00am
|
Administration
Days
|
Hours
|
Monday to Thursday
|
08:00am - 5:pm
|
Friday
|
08:00am - 4:30pm
|
Saturday
|
08:00am - 12:30pm
|
To Setup Slot, Shifts and Rotations:
Go to the 'Setup', then 'Slots, Shifts & Rotations' menu options.
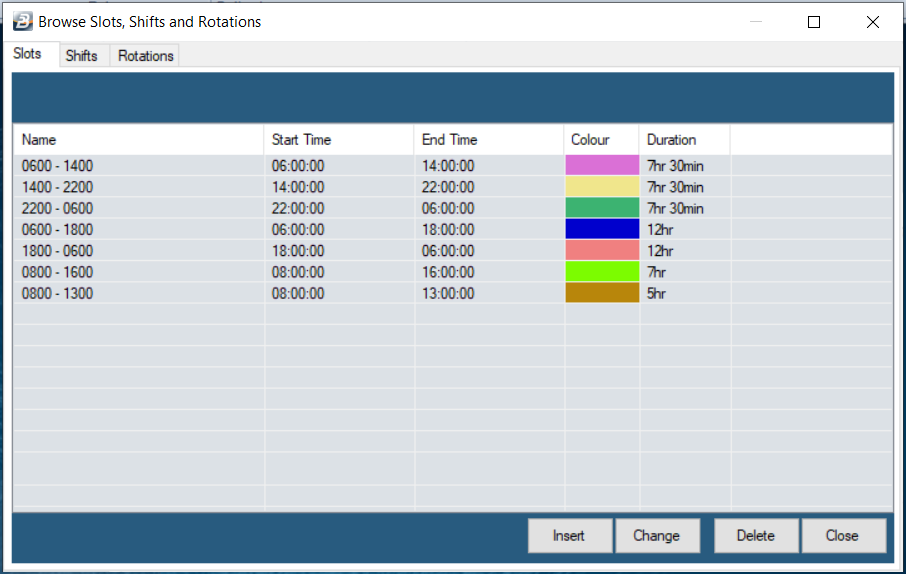
The following table displays with three tabs one for the setup of 'Slots', the second for 'Shifts' and the third for 'Rotations'. The four slots that are displayed are Default entries, which are explained below:
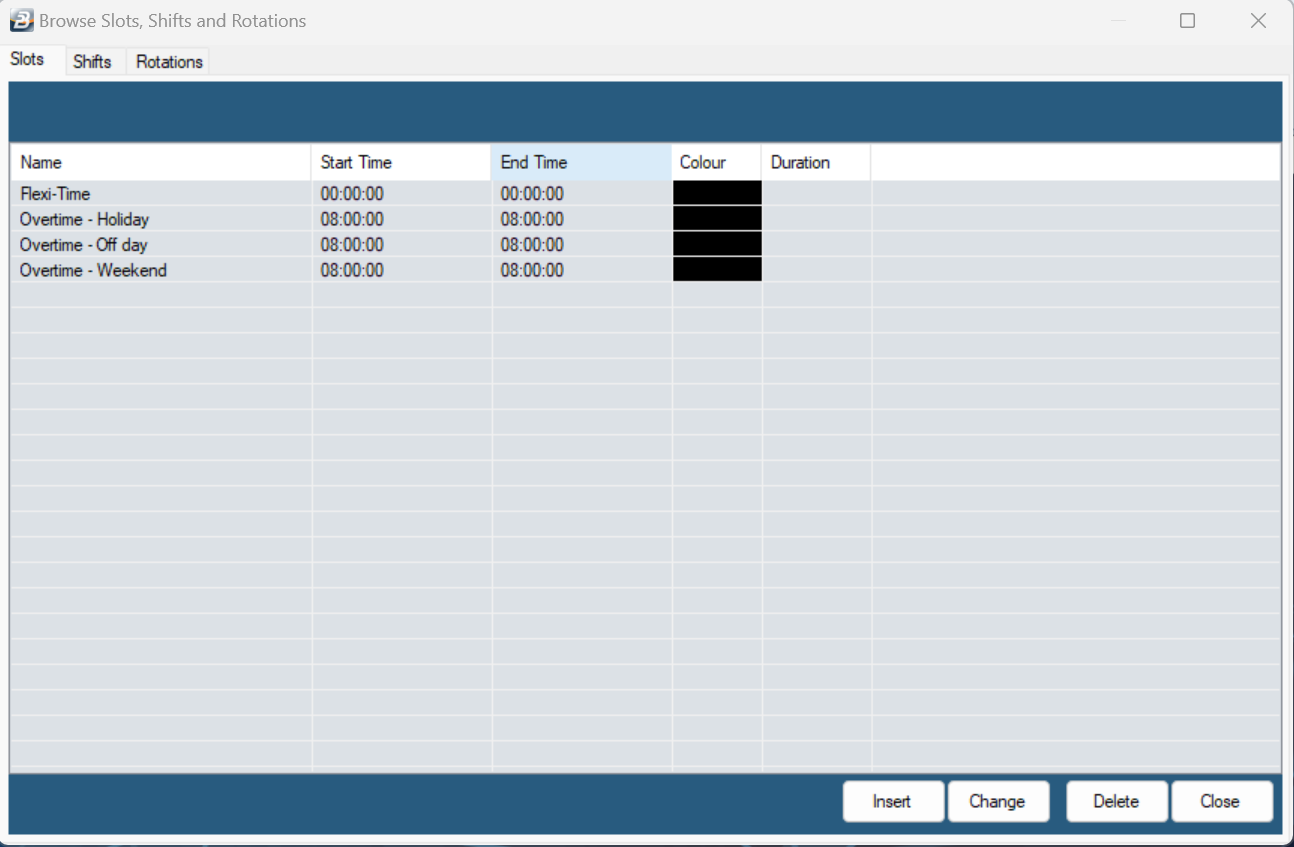
Flexitime
Flexitime is a system generated shift type that is used when employees do not have a fixed 'Clock In' and 'Clock Out' time. The system will take the time between the actual 'Clock In' entry and the 'Clock Out' entry and calculate the actual hours worked. When an employee works on a flexitime basis there are no overtime hours. The system assumes that the employee is working to build up the total normal time requirement.
Overtime - Holiday
When overtime is worked on a day that has been setup to be a holiday the hours worked will be automatically accumulated under the Overtime - Holiday slot. You may wish to review how the holidays have been setup in the calendar.
Overtime - Off Day
When overtime is worked on a day that has been setup to be a 'Rest Day' the hours worked will be automatically accumulated under the Overtime - Off Day slot. Where the Off Day coincides with the weekend then the time goes to the 'Overtime - Weekend' slot by default.
Overtime - Weekend
When overtime is worked on a weekend the hours worked will be automatically accumulated under the Overtime - Weekend slot.
We now go on to add the 'Slots', 'Shifts' and 'Rotations' required for our organization.
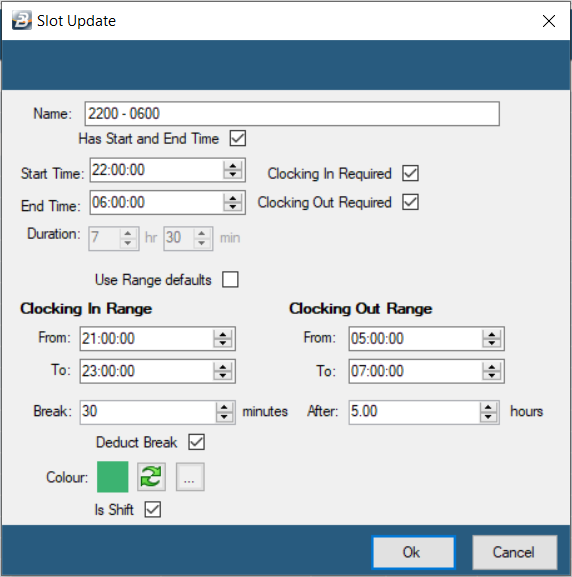
 Slots Slots
Click 'Insert' to create slots
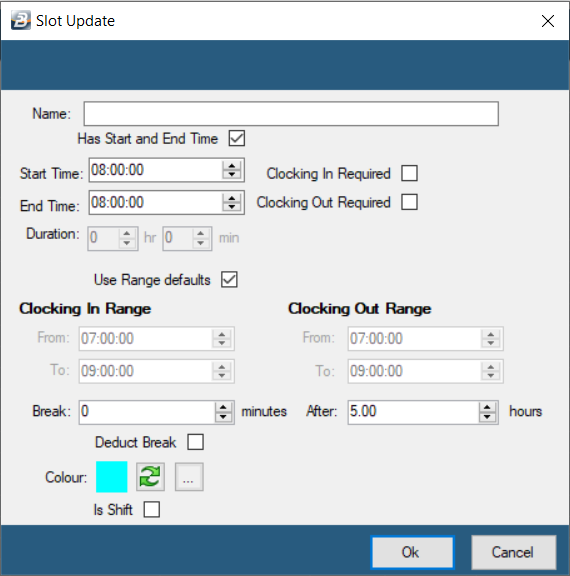
‘Name’
|
Type in the name of the slot. We suggest you use the time ranges to describe the slot when setting them up as this will help you to pick the correct slot more quickly amongst other shifts
|
‘Has Start and End Time’
|
Tick to be able to extract reports on Tardy Clockings
|
‘Start Time’ and ‘End Time’
|
Enter details to enable the calculation of the slot time worked.
|
‘Clocking In Required’
‘Clocking Out Required’
|
Tick to allow the system to use the time that has been clocked from the biometric terminal instead of auto-generating it.
|
'Use Range defaults' for Clocking In and Out.
|
We have ticked 'Use Range defaults' to allow us to set the acceptable times that a person can clock in or out before or after their shift. If there is no tick the system will enter a range automatically.
Any clockings outside the range will not be displayed on the time time card and not included in time calculations. Care should be taken to set realistic ranges that are wide enough to allow early or late clockings.
|
'Clocking In Range'
'Clocking Out Range'
|
Set the acceptable ranges for clocking In and Out.
|
'Break'
|
Set the 'Break' time if employees are to clock in and out for breaks or if the time is being deducted from time worked. This also allows the system to calculate short time if employees exceed the break time. Clock function keys are used to record the Start and End time for the break.
|
'Deduct Break'
|
Tick the checkbox to automatically deduct the break time from the slot time worked.
|
'Colour'
|
Select a colour for this shift that will distinguish it from other slots that may have been setup.
|
'Is Shift'
|
Enable the system to automatically convert the slot into a shift. This is useful if the shift does not require the setting up of more than one slot.
|
Click 'OK to 'Save.
Continue setting up the other shifts. . .
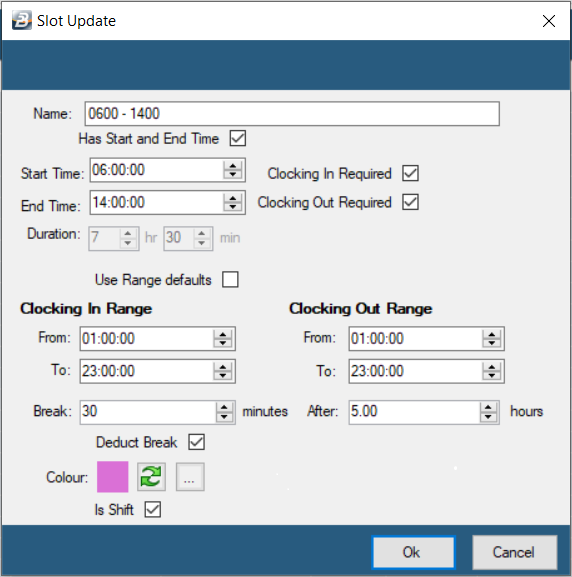
When you are complete the Slots window it should look similar to this:
|
Shifts
Now lets click on the 'Shifts' tab.
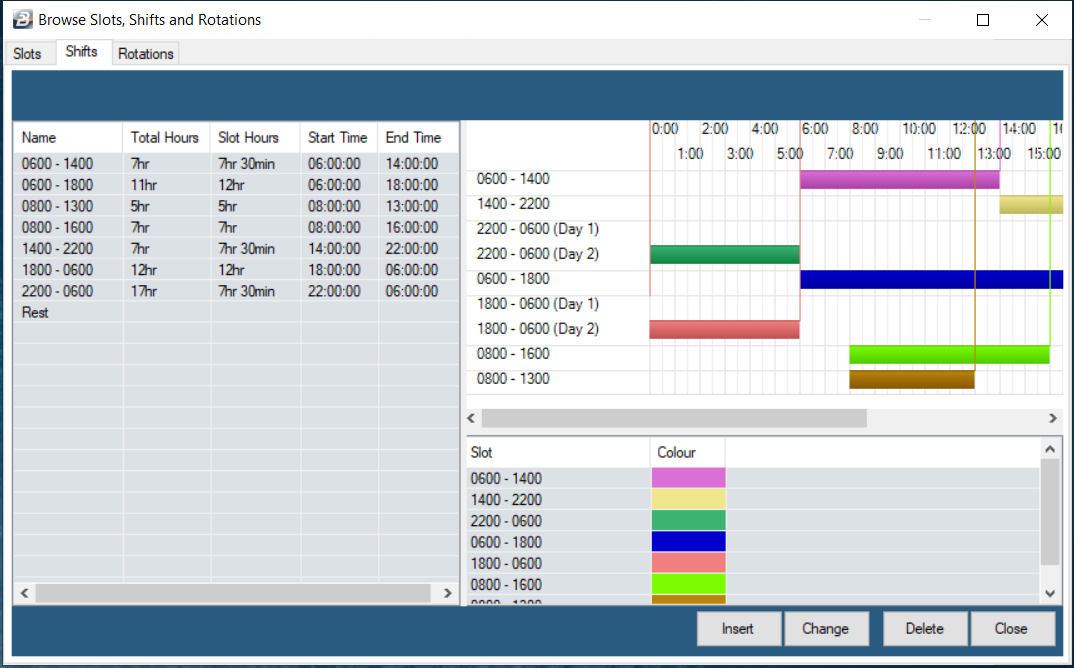
Rest Days
'Rest Days' are a system generated shift type. They are used when an employee is not working on a particular day. If an employee works on a 'Rest Day' then the hours worked are considered to be overtime.
Note:
The slots and the shifts can be adjusted at any time. In the example, above, we configured the shifts when we created the slots. As we continue the example we can move straight onto creating rotations.
|
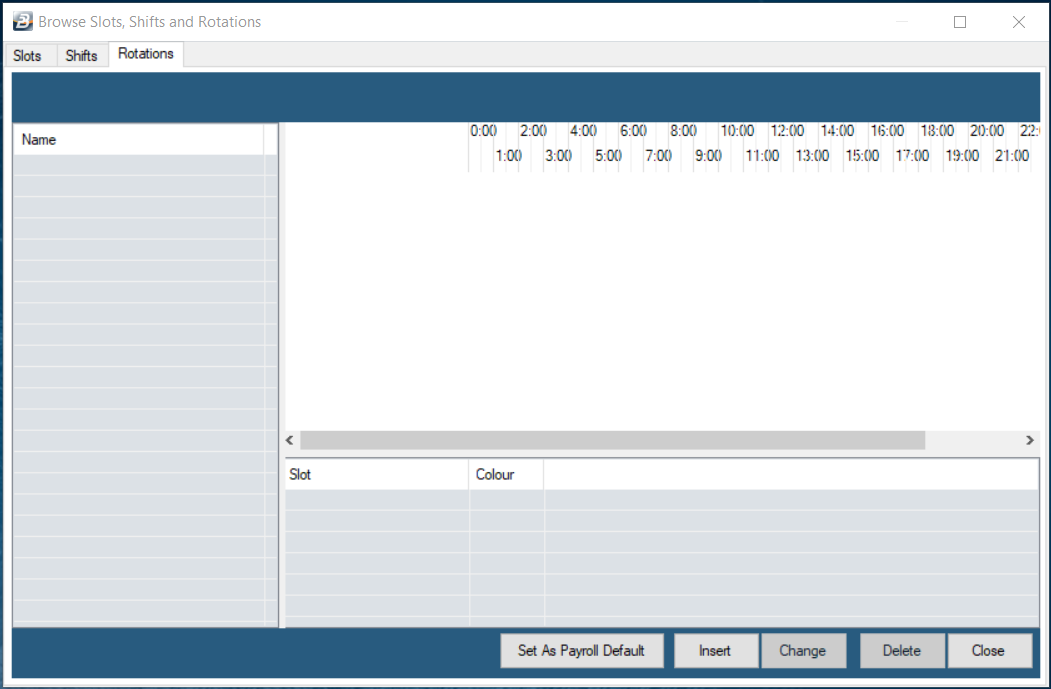
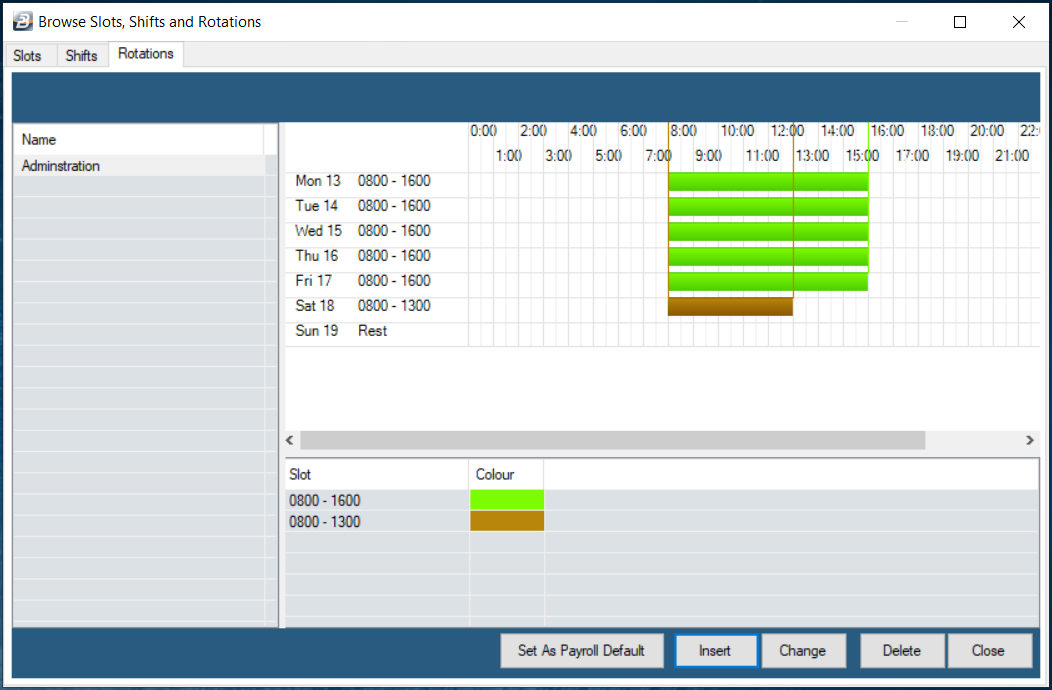
Rotations
Click on the 'Rotations' tab
A rotation is made up of shifts. The number of shifts and their sequential order of arrangement depends on the work schedule of the organization. These should be setup liaising with work supervisors and taking care to satisfy NEC and Labour law requirements.
To setup a Rotation Click 'Insert'.
''Name'
|
Type in the name of the rotation. The name of the rotation should be descriptive enough so that you can be able to easily identify it amongst other rotations in the list.
|
After typing the name of the rotation click the 'Apply' button.
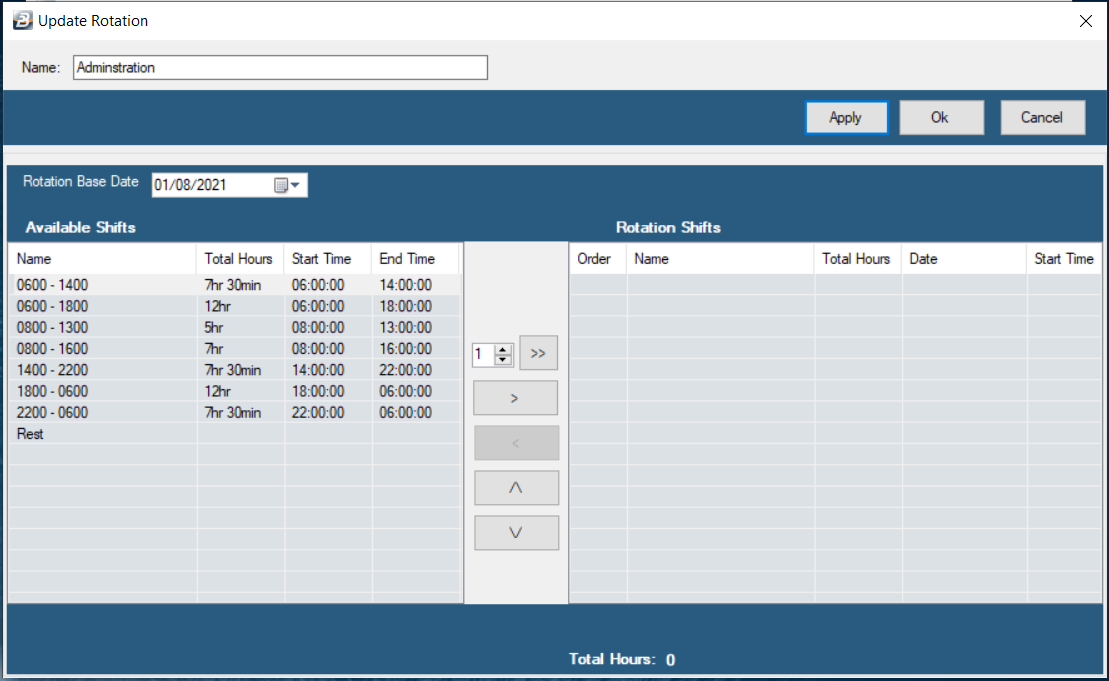
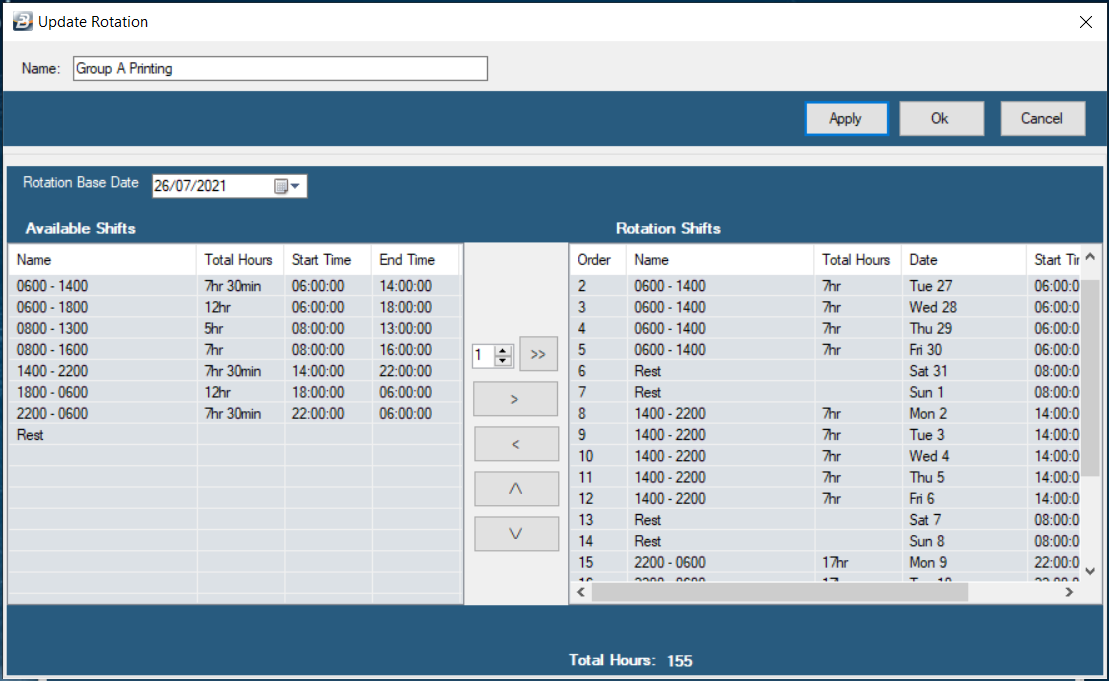
Rotation Base Date
|
Use the Calendar icon or type in the date the Rotation Base date. The rotation base date should always start on a Monday for a best configuration setup.
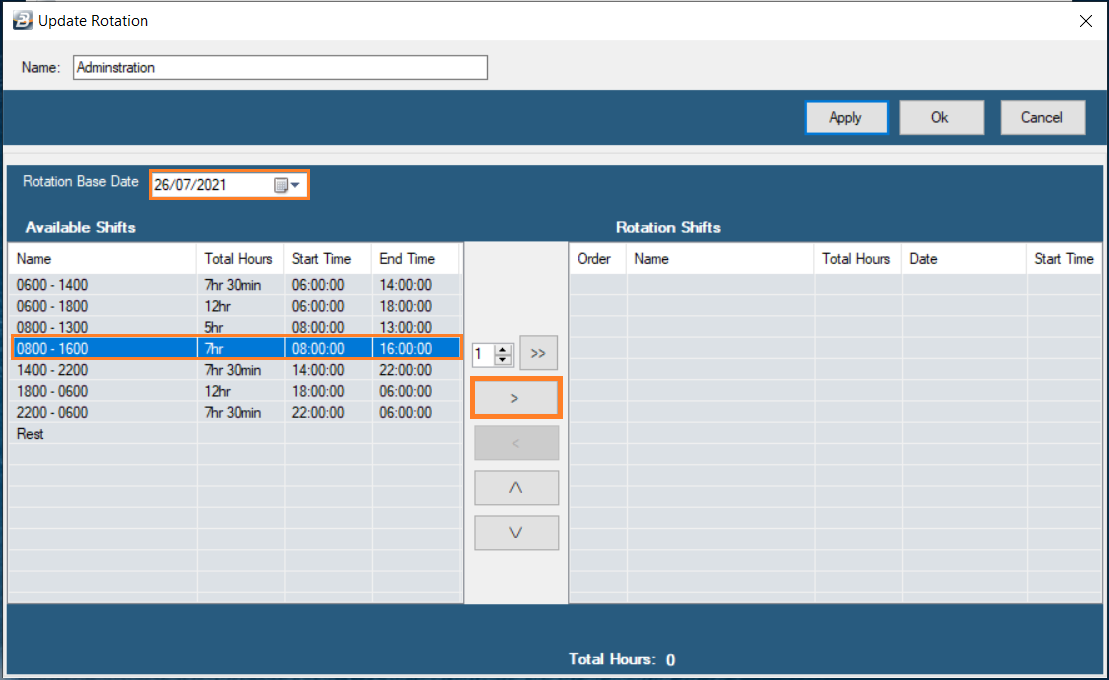
|
Select the first Shift under the Available Shifts panel by clicking on it then click on the button with a greater than sign ..>.. to allocate it on the Rotation Shifts panel.
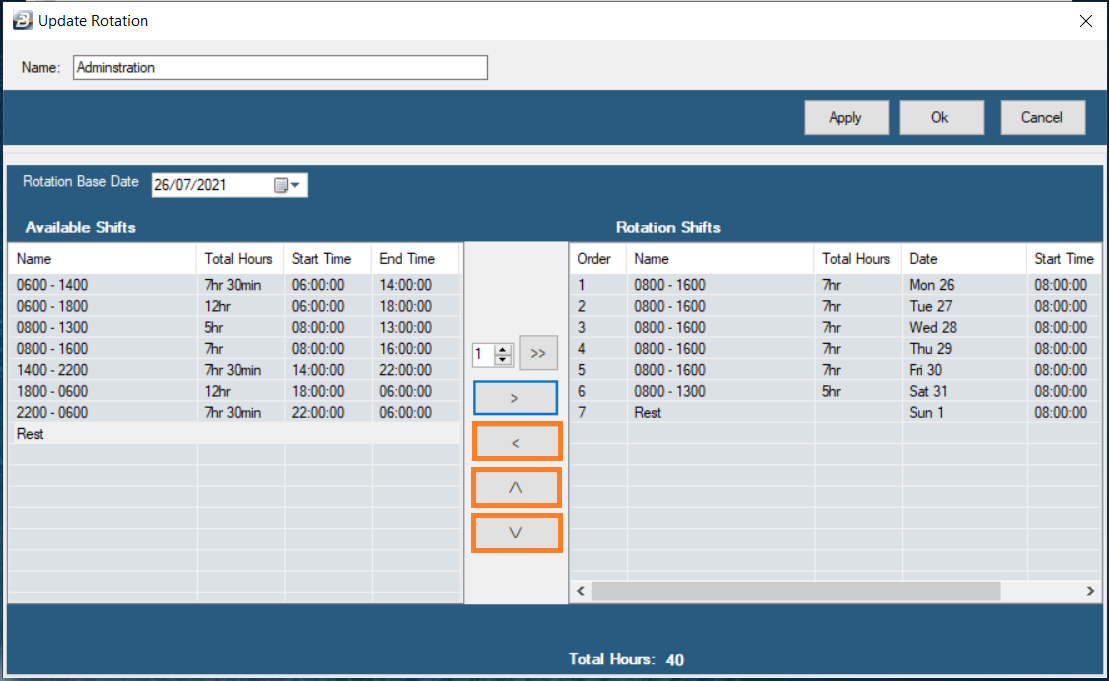
Select the Rest Shift for Sundays or other days not worked. Add rotation shifts until all the required shifts have been entered. Arrange the shifts into the correct order using the highlighted buttons to Remove, or Rearrange the shifts within the rotation.
In this example, the rotation follows the order the shifts from the first shift to the last (1 to 7) and then repeats itself again from 1 to 7. This is a common shift rotation.
Click ‘OK’ to Save.
Click ‘Insert’ to create another Rotation.
Use the arrow buttons to arrange the shifts into the correct order. using the highlighted buttons. Click ‘OK’ when complete.
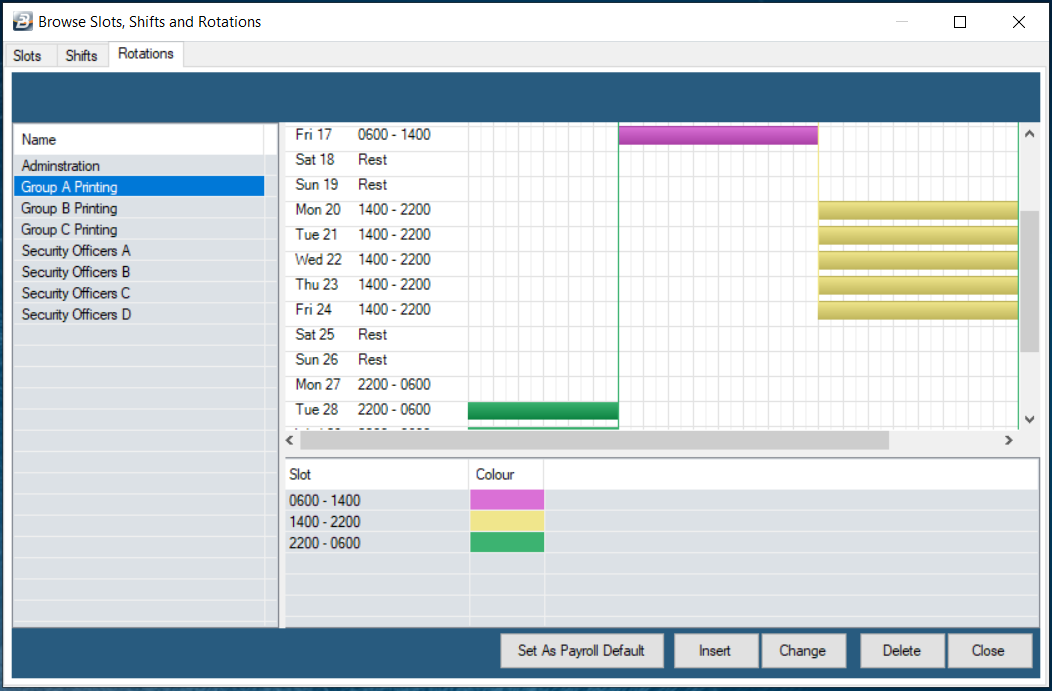
Click ‘Close’ when you are through.
|
|