Once fingerprints have been captured for all the clocks being used we are ready to have the employees start clocking in and out.
Employees are able to use the clocks where their fingerprints have been enrolled. This forces them to use the clocks assigned for their use.
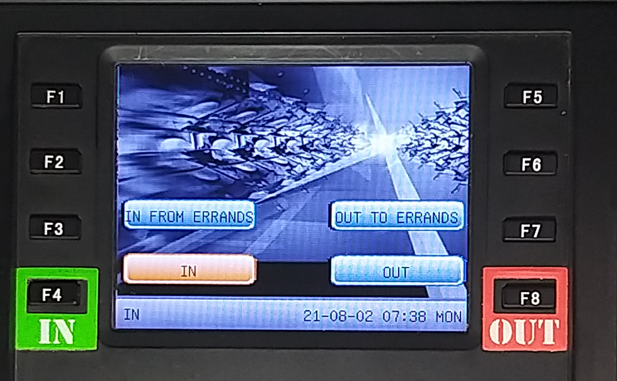
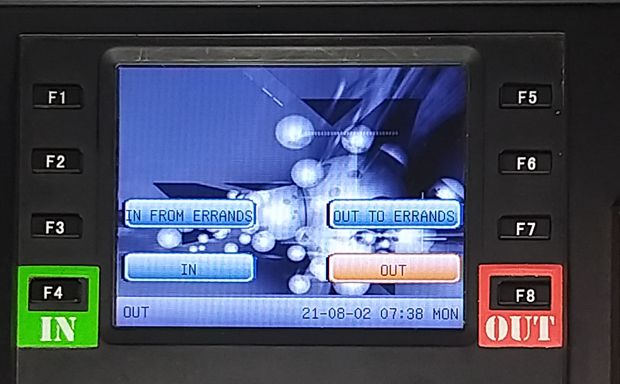
To CheckIn first press the In button (Normally F4) then place the finger on the sensor. To CheckOut first press the Out button (Normally F8) then place the finger on the sensor. If auto switch settings have been configured on your clock you just need to put your finger on the sensor without pressing the CheckIn or CheckOut buttons.
When a new clocking system is introduced, supervision is required at the clocks to ensure that the employees are successfully clocking in. It may take time for the employees get into the routine of clocking in and out successfully. It is worth doing this thoroughly and the first few days of clockings.
The first days of clocking could be used as a practice run for the employees clocking in, as well as for the time recording staff to process the data and make adjustments to the data as well as to their procedures to improve efficiency in the clocking process.