The following are the steps to be taken to capture fingerprints
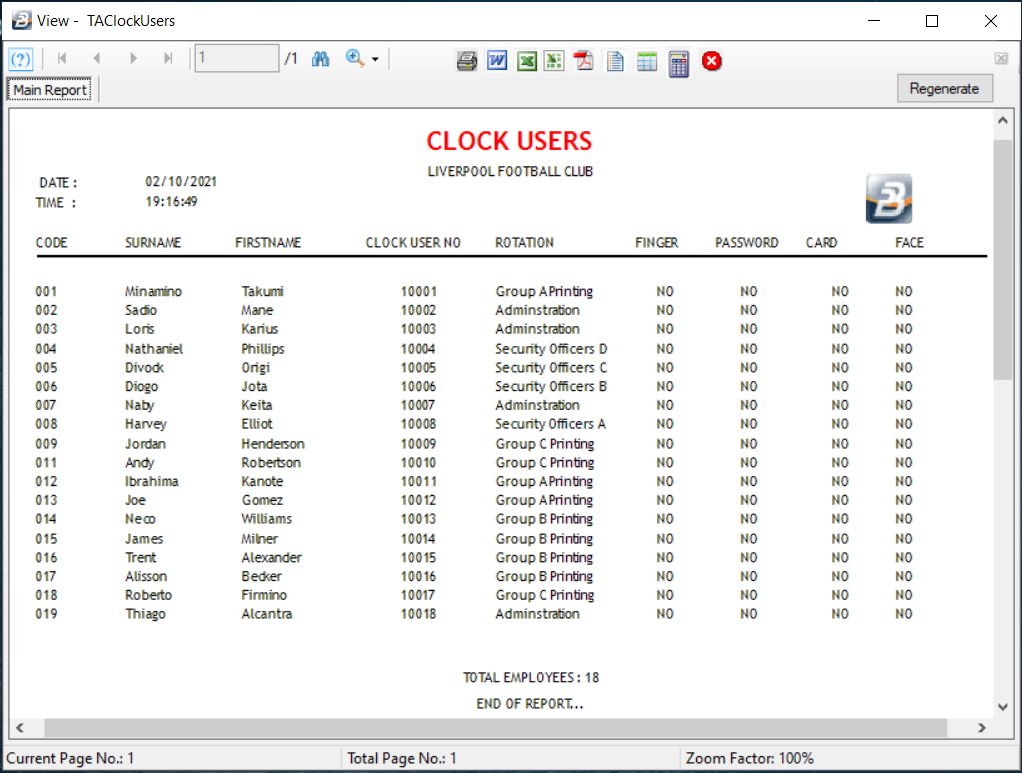
It is useful to print a list of employees that can be used when setting up the employees on the clocks.
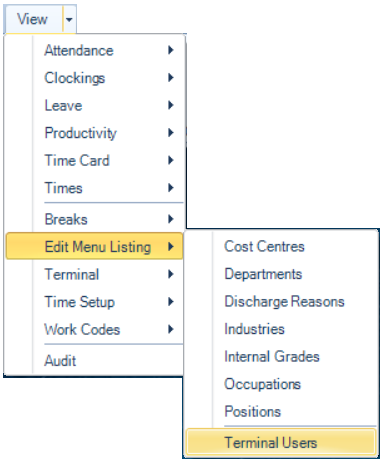
To do this: Go to the ‘View’, ‘Edit Menu Listing’, then ‘Terminal Users’ menu options.
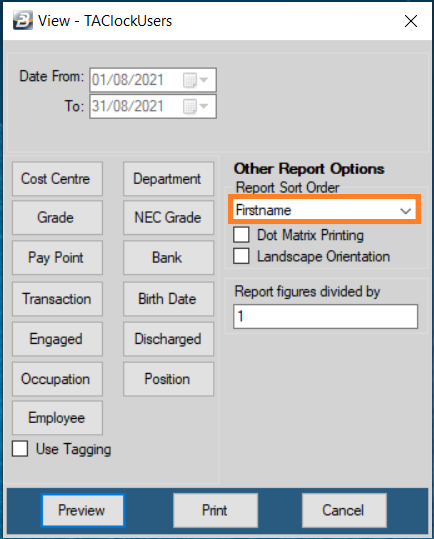
The range selection screen appears.
Change the ‘Report Sort Order’ to have names listed in alphabetical order according to First Name or Surname. If there are a lot of employees it may be useful to print the names by Department, Cost Centre or Paypoint, if not then all the names could be printed in one listing. Press ‘Preview’ to view and check the report. When satisfied press ‘Print’ to have the selected names printed.
|
![]() Capturing Fingerprints – On the Clock
Capturing Fingerprints – On the Clock
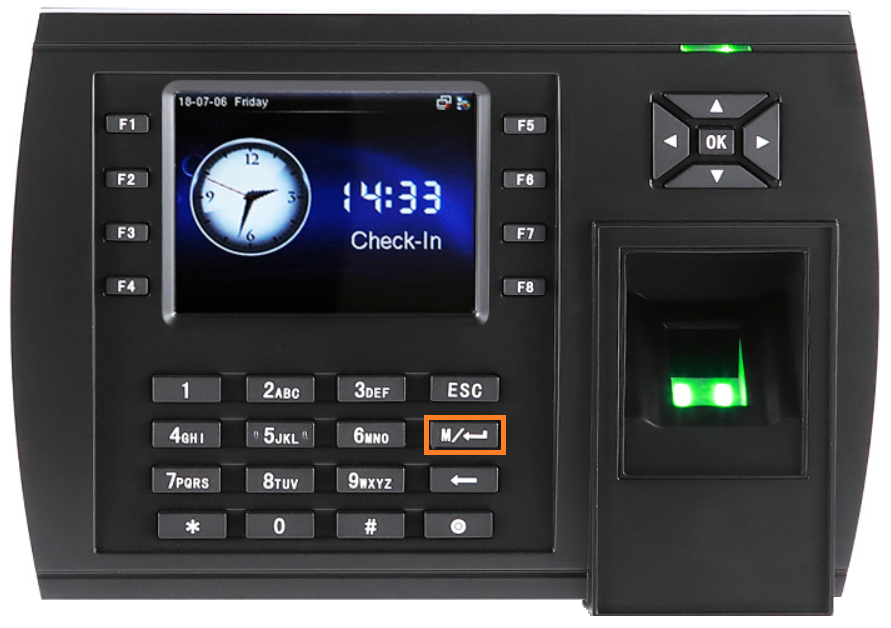
With the printed list (Clock Users Report Above) now go to the Clock. Belina Time Systems uses a variety of biometric clocking device types that they use. The TFT500 is one of the most popular devices that we use. Whilst the clocks are different models they have also have many similarities.
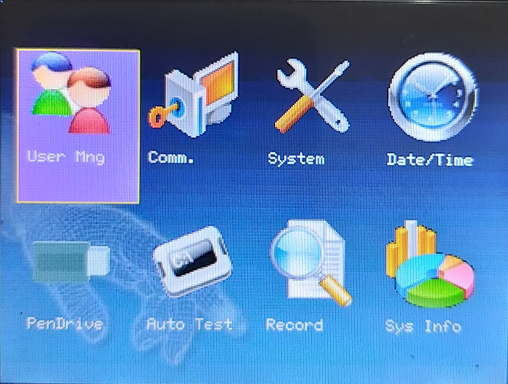
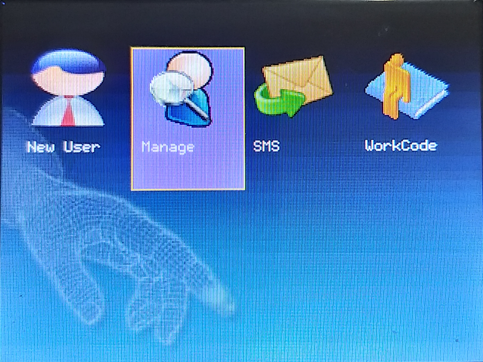
Press the Menu button (Highlighted button) After pressing the menu button the clock screen automatically 'User Mng' Icon.
Press the 'OK' button on the keypad to select it.
After selecting the User Mng the screen by default highlights the Manage Icon. Press the 'OK' button on the navigation keypad to select it.
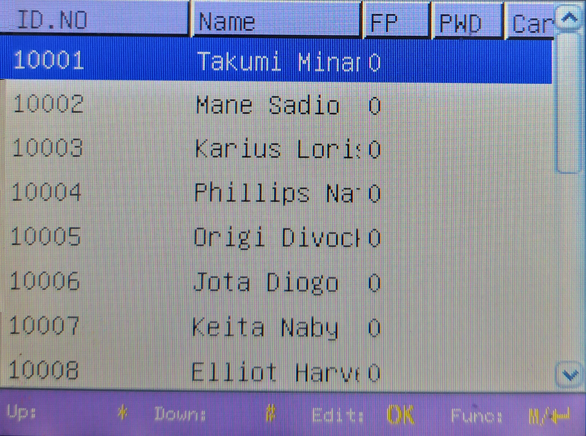
When the User List displays on the screen use the navigation buttons to look up the name for who you want to capture fingerprints. Highlight the person then press ‘OK’ to select. Where you have a lot of employees it is easier to look up and punch in the person’s User ID on the keypad on the clock. Use the print-out produced earlier to assist in doing this. The first digit that you punch will prompt the clock to display the search screen.
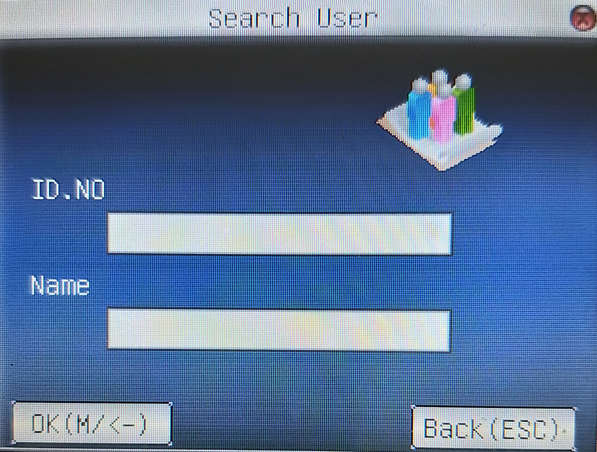
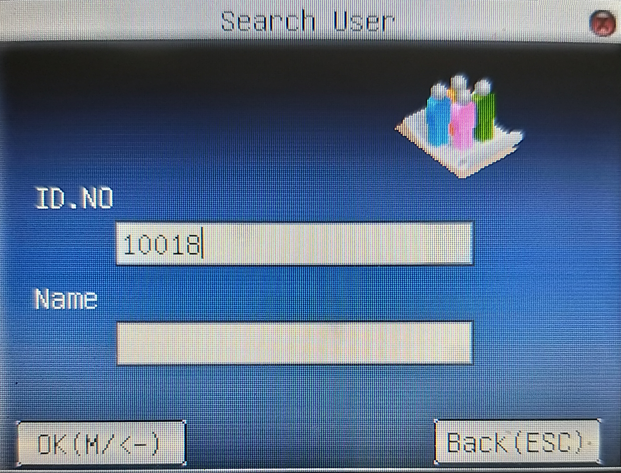
Type in the 'ID. No' using the Keypad.
Then press ‘OK’ on the keypad.
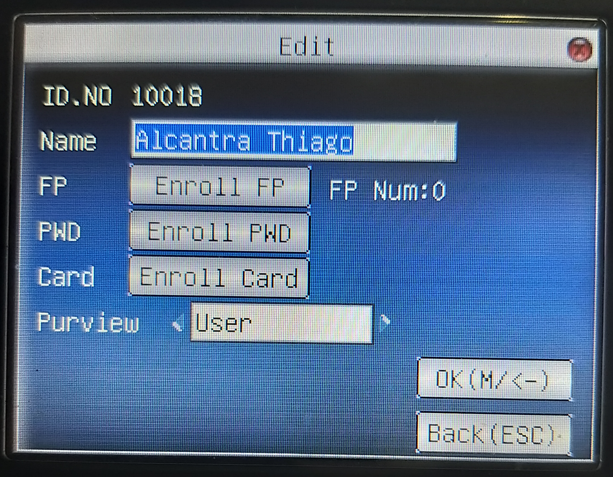
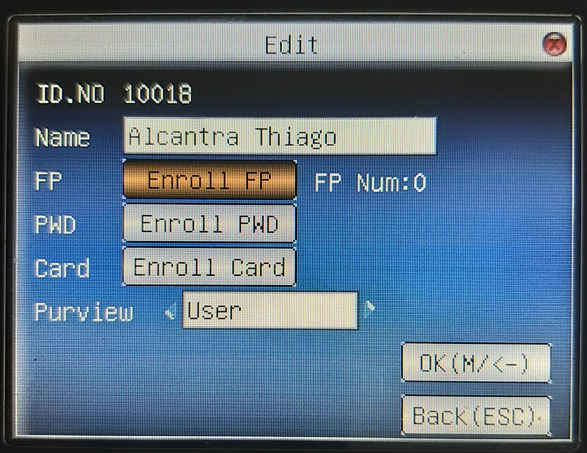
Press the ‘OK’ button to select the record. Use the navigation key pad to highlight the ‘FP’ field and then: Press the ‘OK’ button.
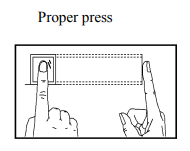
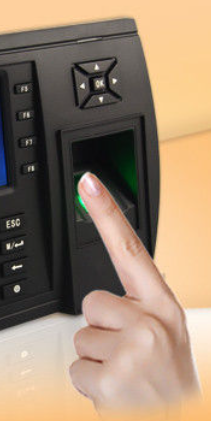
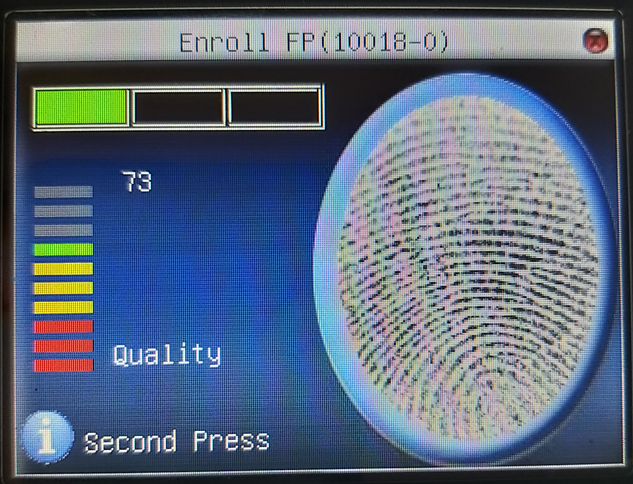
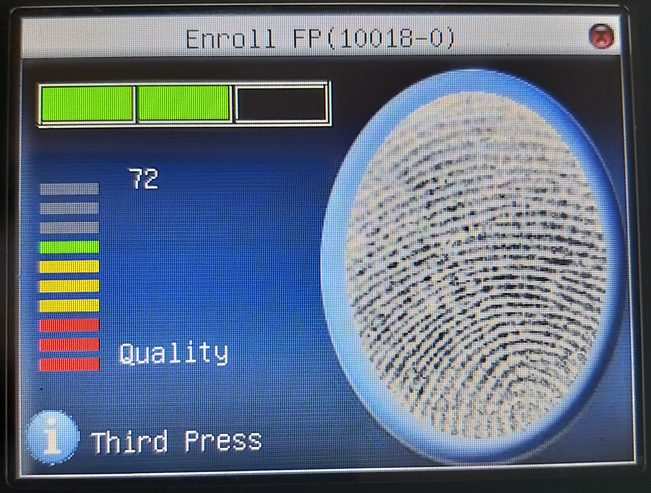
Enroll fingerprint of any finger that the employee prefers to use. Press the finger on the centre of the sensor window.
Press the same finger three times on the sensor.
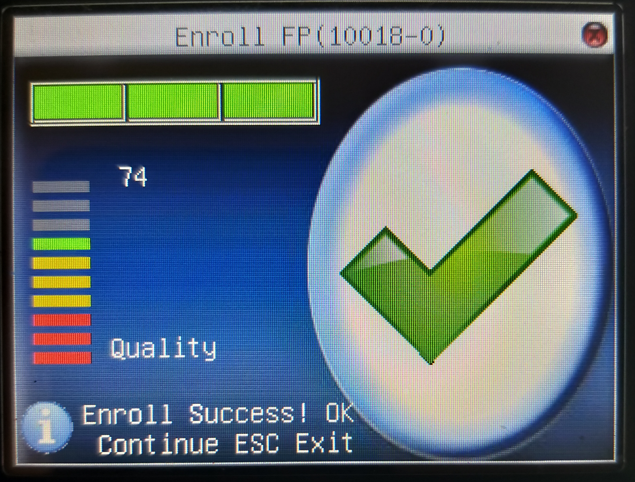
After placing the finger for the finger on the sensor for the 3rd time the clock will give a success confirmation with a green tick. Press ‘OK’ on the navigation keypad to proceed. The clock will prompt you to capture the fingerprint of a second, backup finger. Repeat the process of capturing the fingerprint with the second, different, finger. The clock will prompt you to capture the fingerprint of a third finger but in practice we think two fingers are enough. If you want to capture a third fingerprint do so, otherwise press the ‘ESC’ button to abort the process.
Notice you now have ‘FP Num:2’ indicating that you have captured 2 fingerprints. Administrator: Use the navigation pad to get to the ‘Purview’ field to change from ‘User’ to ‘Administrator’ if the person is eligible for that privilege otherwise if not just proceed and press ‘OK’ to save the changes.
Continue to capture fingerprints for the rest of the employees or press the ESC button to close the Window |


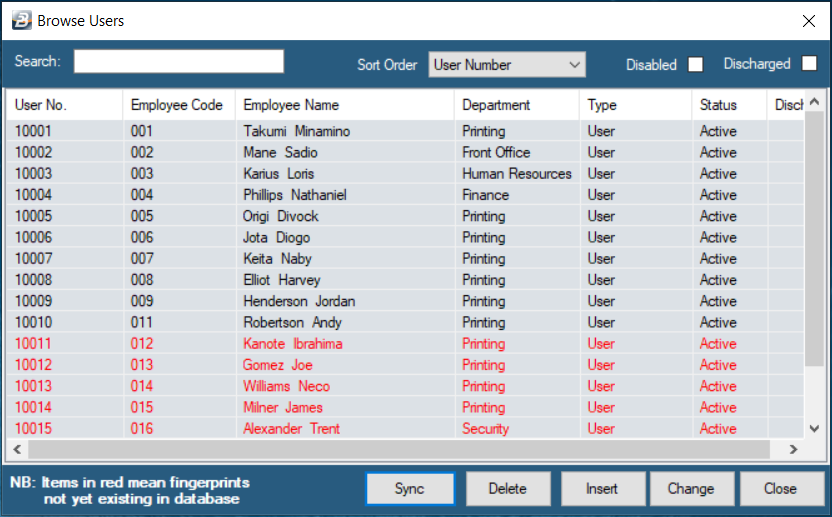
![]() Capturing Fingerprints – Saving fingerprints in software
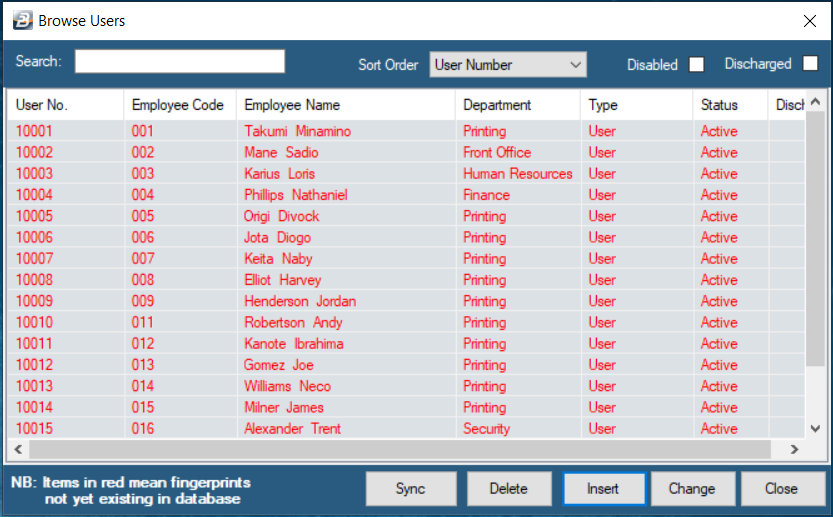
Capturing Fingerprints – Saving fingerprints in software
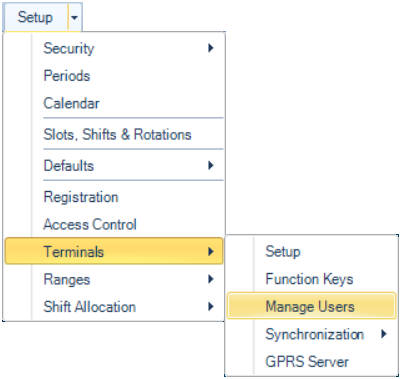
Go to the ‘Setup’, ‘Terminals’ then the ‘Manage Users’ menu options.
Employees listed in red are those that do not have saved fingerprints.
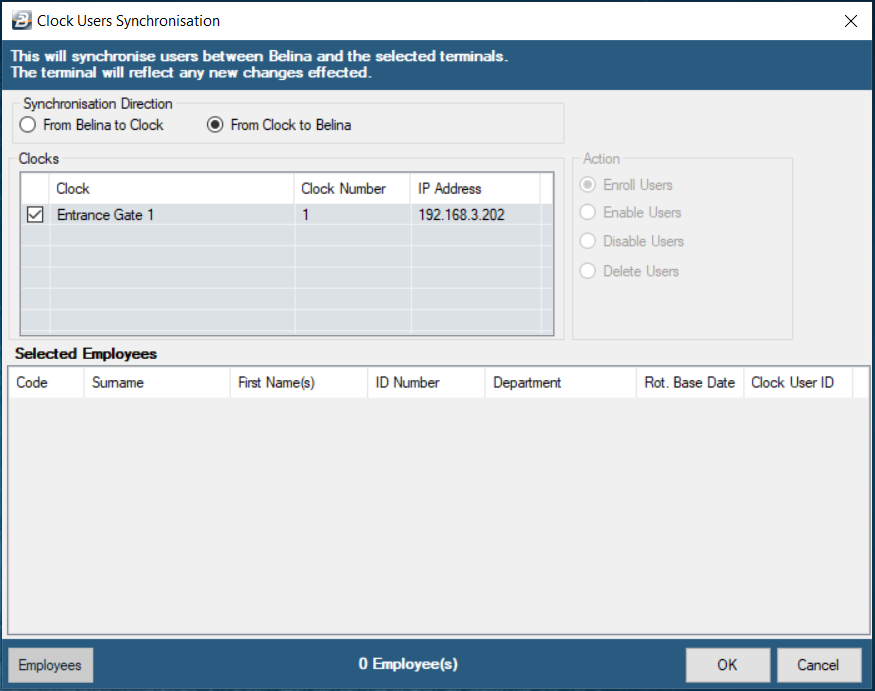
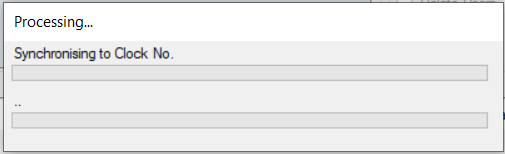
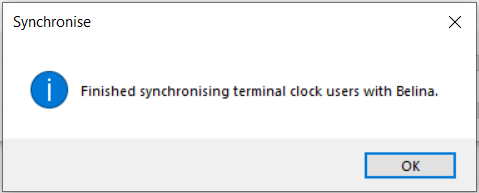
Press the ‘Sync’ button. Another screen displays: Move radio button to ‘From Clock to Belina’ to have fingerprints transfer from the clock Click the checkbox next to the clock from which the fingerprints are to come from Click ‘OK’ to have the system transfer the fingerprints from the clock. A processing screen is displayed whilst the procedure runs and then another shows when the complete.
Press ‘OK’ to continue.
Notice that employee names are displayed in black for all those that had fingerprints transferred. |
![]() Capturing Fingerprints – Transferring to other clocks
Capturing Fingerprints – Transferring to other clocks
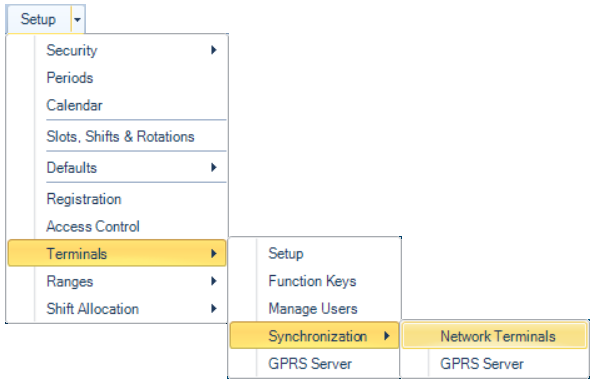
There may be some employees that need to be listed on more than one clock. This would give them the flexibility to clock in or out on different clocks. To do this: Go to the ‘Setup’, ‘Terminals’ then ‘Synchronization’ then 'Network Terminals' menu option.
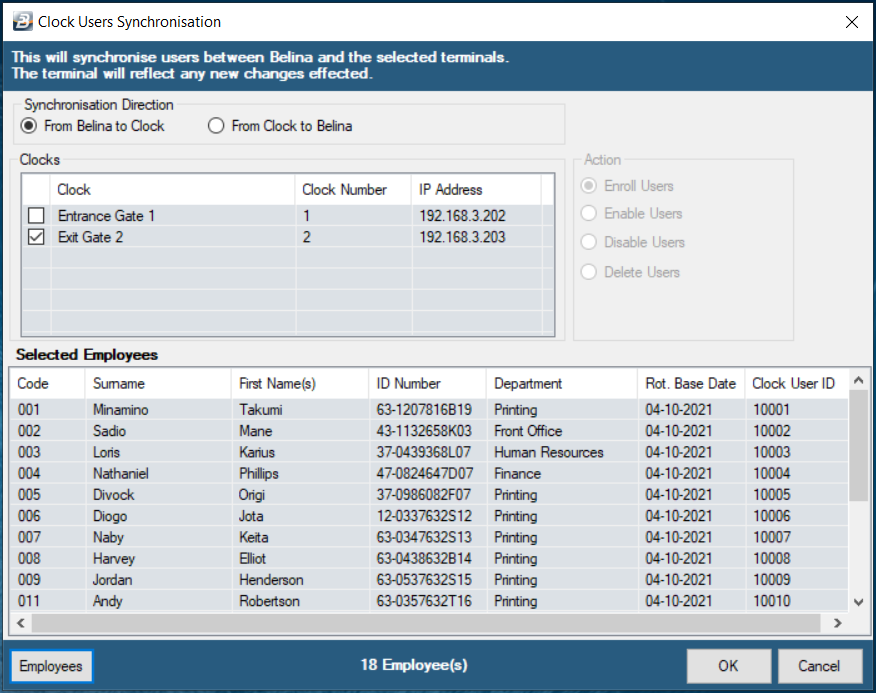
Another screen displays:
This time move radio button to ‘From Belina to Clock’ to have fingerprints transferred from the Belina Time Control module to the selected clock. Click the checkbox next to the clock to which the fingerprints are being transferred. Click the ‘Employees’ button to select the range of employee fingerprints to transfer. Click ‘OK’ to have the system transfer the fingerprints of the selected employees to the selected clock.
|