The Admin menu includes additional setup functionality and information that is available to the Administrator. This includes:
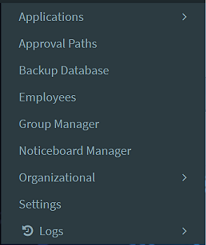
There are a number of Functions to setup. We start by setting up the privileges that apply to Employees, Reviewers and Approvers. This is done using the 'Group Manager' menu.
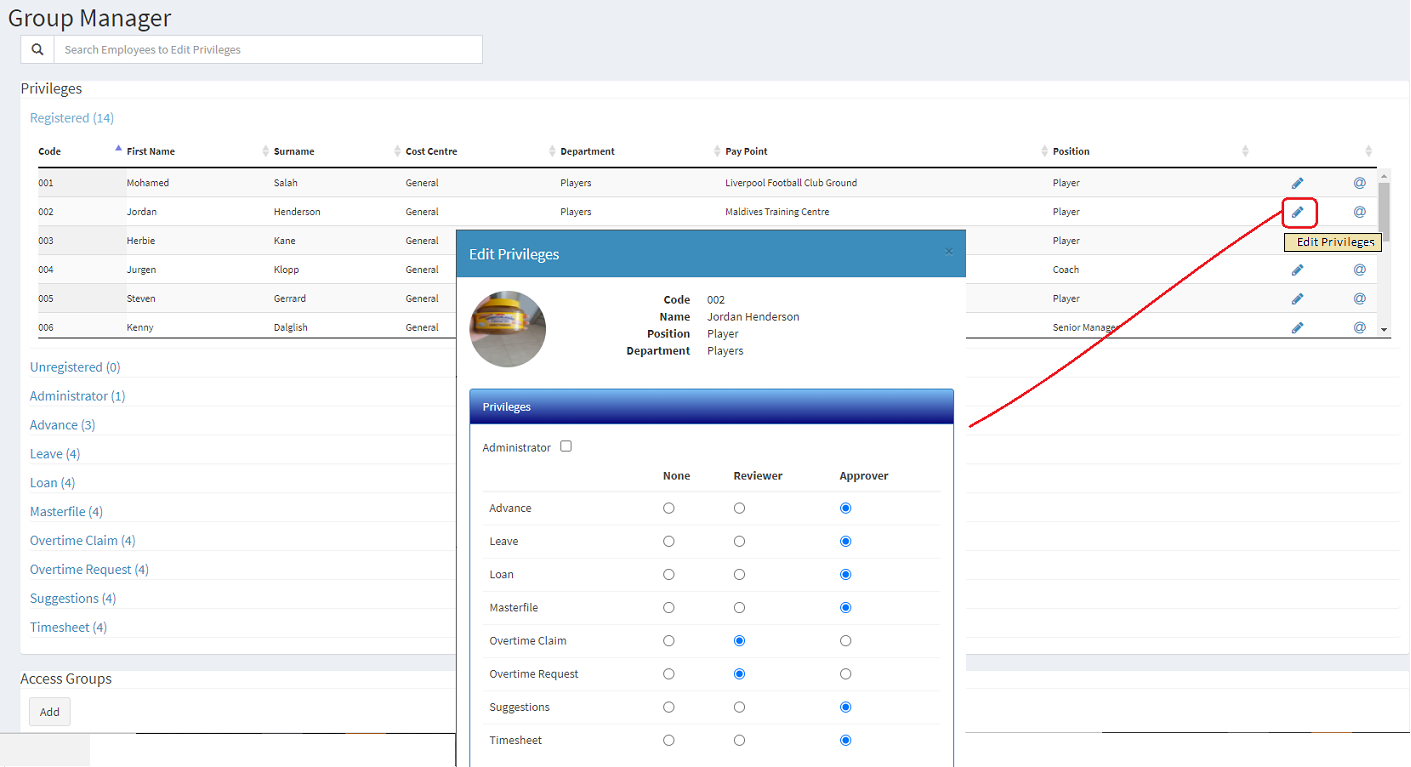
Use the Group Manager menu option to set up the Groups of employees. These groups have different Privileges in reviewing or approving different types of Application.
To Edit Privileges under Group Manager: - Go to the menu on the Left hand side of the screen, - Click on 'Admin' - Select the 'Group Manager' from the drop down menu.
The following screen displays:
A listing is shown. This comprises:
To set up Privileges an employee: - Find the employee under either the list of 'Registered' or 'Unregistered' employee headings on the left hand side of the screen. - Click on the 'Edit Privileges' icon, then - The Privileges window displays the privileges. Move the radio buttons if a privilege applies for the application type to 'Reviewer' or 'Approver'.
''Administrator' Checkbox - if the employee is to be given administrator privileges then place a tick in this box. This means that the employee would have access to the 'Admin' menu options.
@ Symbol: A facility that allows an Administrator to see and change the login Business Email, Personal Email or Mobile number of an employee. These changes do not carry over to the payroll master record when a Synch is done.
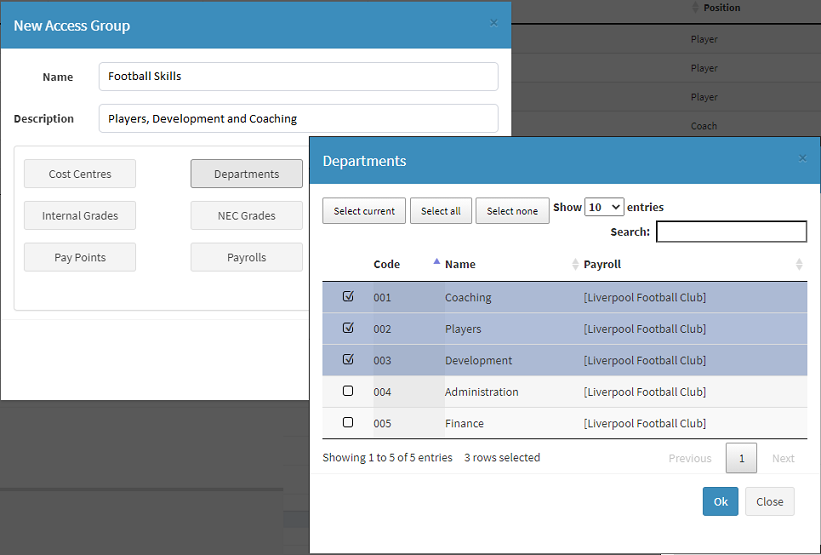
Access Groups Create a group of employees that is distinct from another. Employees in one group will not be able to access or see employees in another group, including the adminstrator.
|

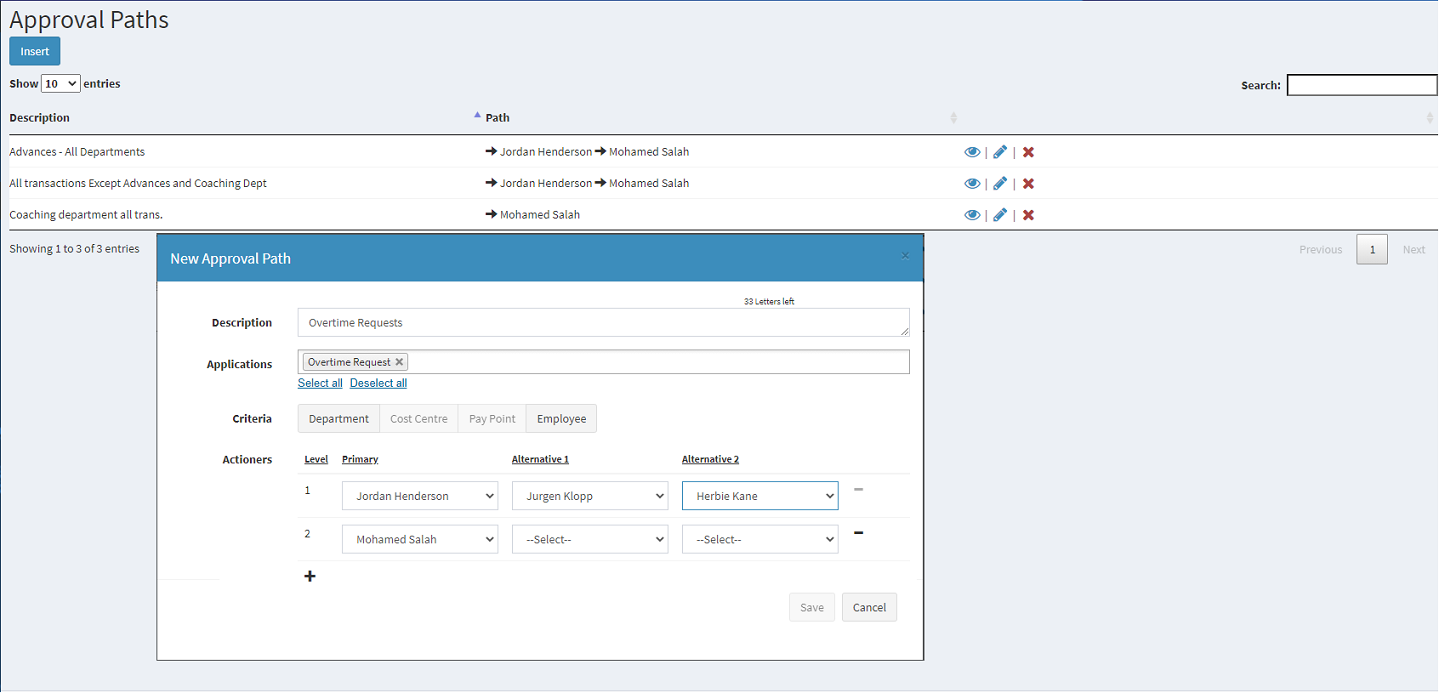
Approval paths describe the flow of applications that are made by employees through the approval process. In a small organization the applications may go directly to one person for approval but in larger organizations the applications could through others who would review and comment on the application so that the final approver can make an informed decision. Once the final approval has been given then the application is actioned and sent to payroll.
To setup up an approval path: - Go to the menu on the Left hand side of the screen, - Click on 'Admin' - Select the 'Approval Paths' from the drop down menu. - Press 'Insert' to add a new approval path - Enter a suitable 'Description' for the approval path being setup - Select the types of 'Application' that will be included in this approval path. Click in the 'Applications' text box to select from a dropdown men, or press 'Select All' to select all types of application. This can be edited to remove application types not to be included in this approval path. - Click the 'Criteria' to be used to select the range of employees that will have the selected application types approved using this approval path. Note: it is possible to select any one of 'Department', 'Cost Centre' or 'Paypoint possibly in conjunction with the 'Employee' buttons. It is not possible to combine Departments, Cost Centre and Paypoint criteria. - We are now going to select the people who will action the application as a Recommender or an Approver. Actioners - It is necessary, as a minimum, to have just one 'Actioner'. - At each level of approval select the 'Primary' Actioner and any 'Alternatives' that there may be - Applications can go through more levels of approval, but the last Actioner needs to be able to approve the application. Approvers and Recommenders are setup under Group manager. - To add an additional level of approval use the '+' button. - When complete press 'Save'
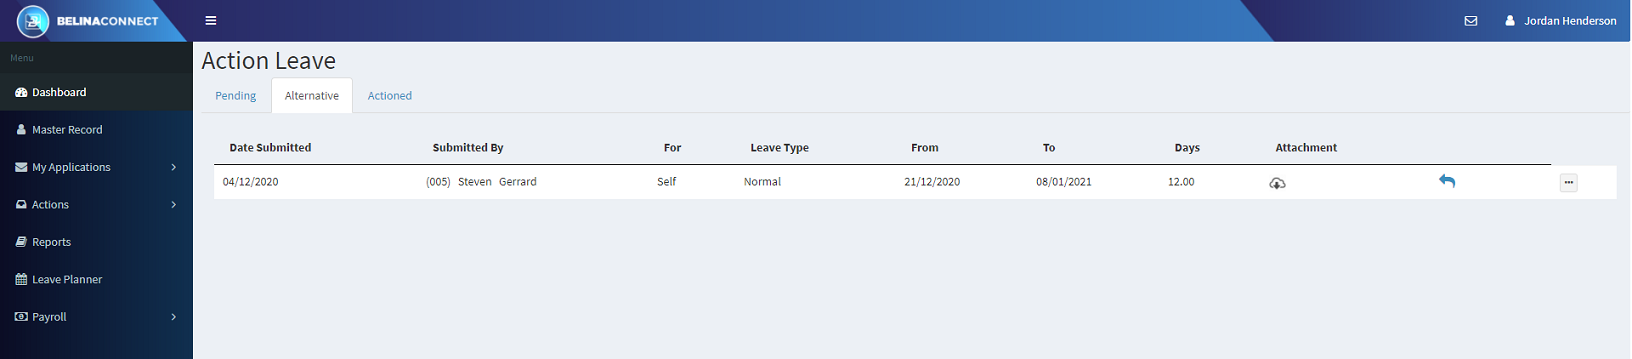
Alternative Actioners: When an Alternative Actioner is selected all applications go to their inbox but under the 'Alternate' tab. If appropriate that Alternative actioner can go into that box and process the application. There would need to be an understanding between those at that level as to who would action the application
|
The Noticeboard displays notices on the Dashboard of the Belina Connect Module. Uploaded notices are displayed for the period specified.
For an Administrator to add a new notice to the Noticeboard in the Connect Module: - Go to the menu on the Left hand side of the screen, - Click on 'Admin', then - Select 'Noticeboard Manager' from the drop down menu. - The table of 'Notices' that have been created is now displayed. Click the 'View' or 'Edit' icons on the right hand side of each notice listed to either view or change what has already been created. - To create a new notice press the 'Insert' button. The 'New Notice' form displays and is ready to receive input.
|

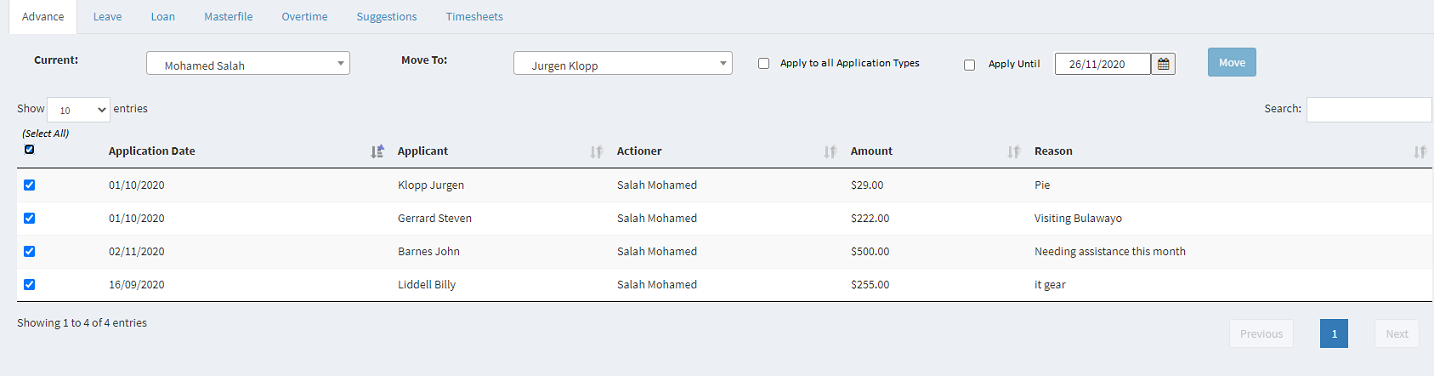
If it is necessary to reassign applications pending approval to another person, use this function to move them, in bulk, to another actioner.
To do this: - Go to the menu on the Left hand side of the screen, - Click on 'Admin', - Click on 'Applications', - Click on 'Redirect', This is the screen that appears:
|
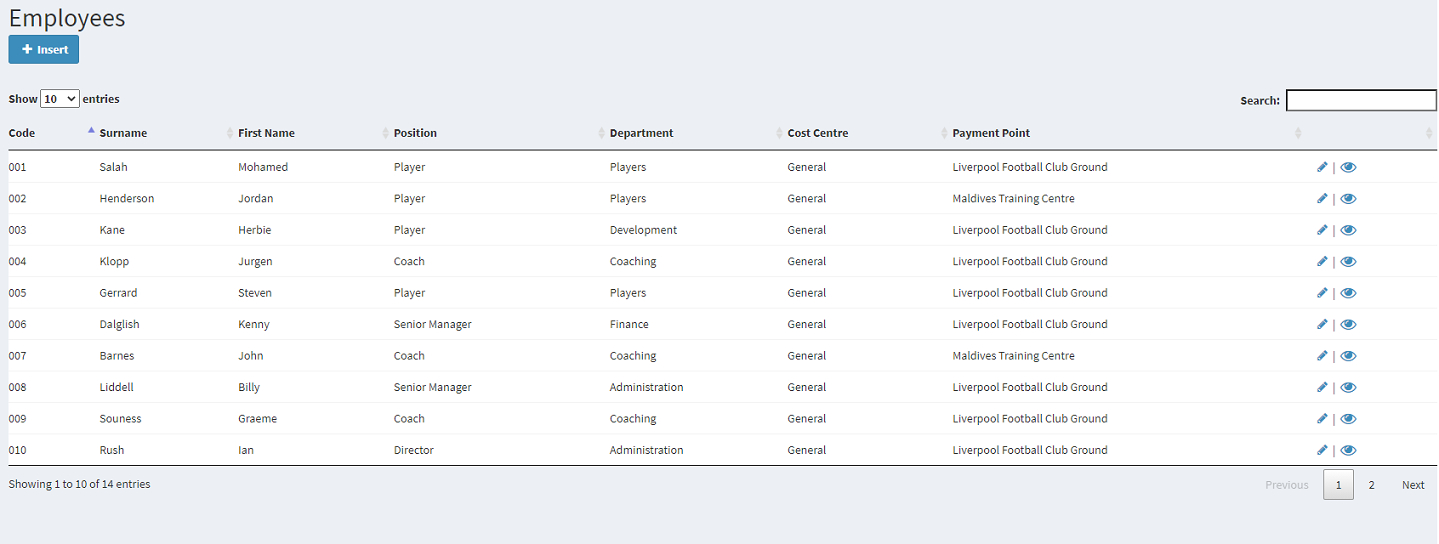
The 'Employees' option allows the Administrator to see the Employee Master record for an employee.
|
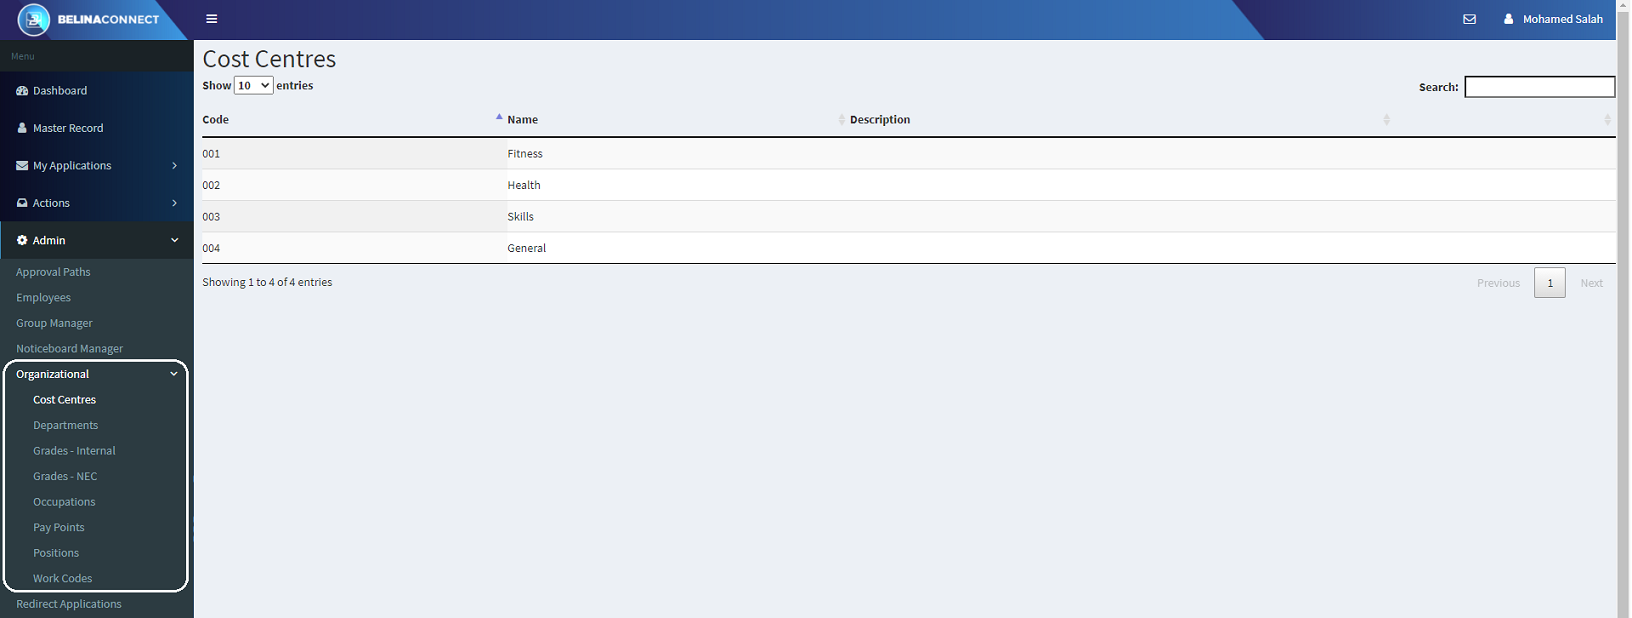
The 'Organizational' option allows the Administrator to see the setup in the payroll of: Cost Centres, Departments, Grades Internal, Grades NEC, Occupations, Paypoints, Positions and Work Codes. The screen, below, shows the Cost Centre setup in the payroll. The other options are similar.
|
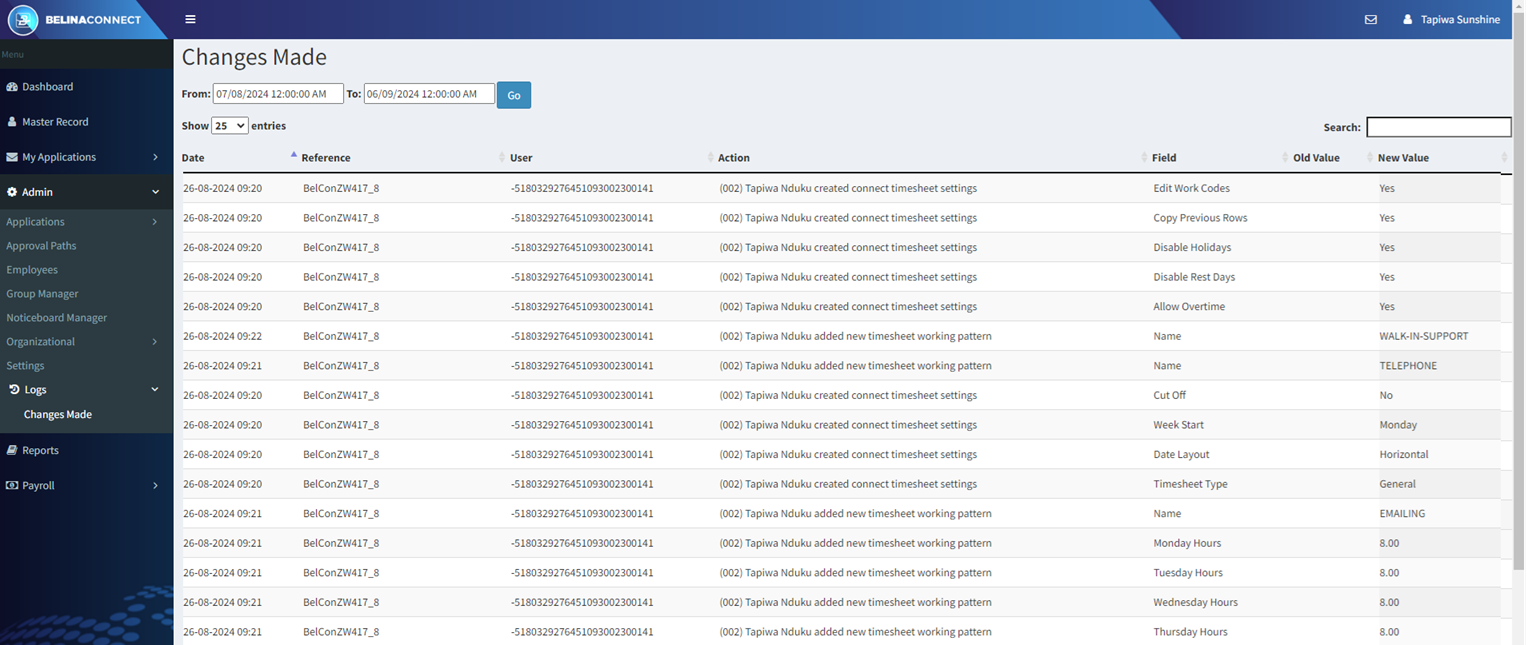
The Changes Made log shows which fields have been changed.
To access the 'Changes Made' option: •Select the 'Admin', 'Log', then 'Changes Made' menus
|