In most situations the terminal is linked to the Belina Time Control Module by: •Ethernet or •Wireless network connection.
Data may be downloaded (polled) at specified time intervals. When this happens the transaction data is copied from the terminal to the Belina Time Control Module and saved in the SQL database. This is a form of backup for the terminal data.
The type of data that can be backed up includes:
1. Transaction data 2. List of Users with their fingerprints/ facial data
If the data is being backed up onto a USB device from the terminal the backup could include: 1. Transaction data 2. List of Users with their fingerprints/ facial data, plus 3. Attendance log data
Having the backup on a USB drive is useful should the network fail. Data can be transferred to the Time Control Module manually. It is also useful to have a backup of the terminal data on a USB for audit purposes where a comparison needs to be done between what has been recorded on the terminal and what was transferred into the Time Control Module. |
The backup process differs slightly between the types of terminal being used in the system. Start by inserting a USB drive into the USB slot on the terminal.
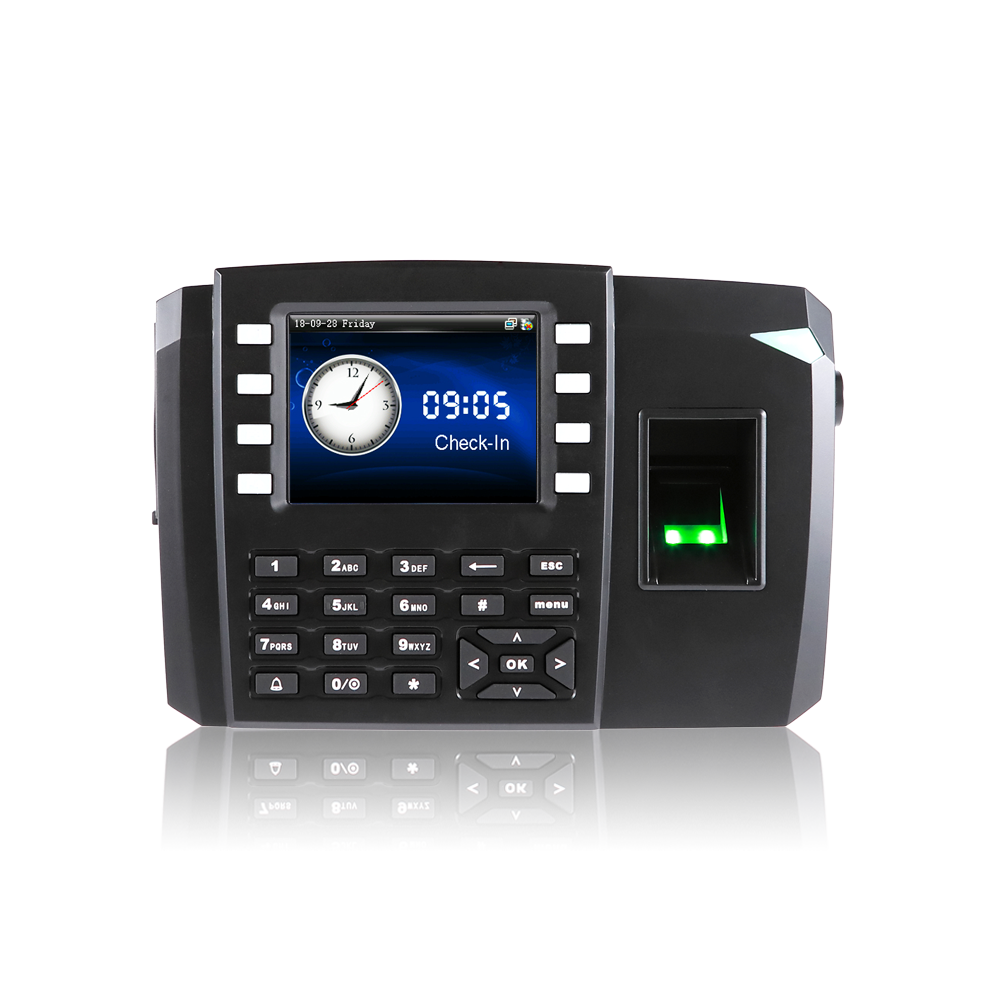
![]() Backup Transaction data to USB - TFT500, TFT600 Mk1
Backup Transaction data to USB - TFT500, TFT600 Mk1
Press on the ‘Menu’ button on the terminal
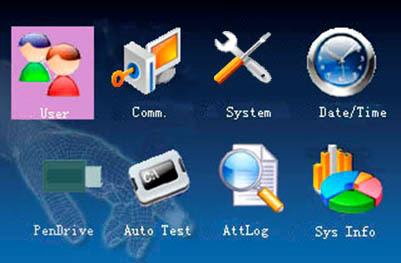
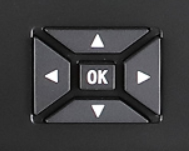
•If an Administrator has been setup the administrator needs to unlock the menu using their fingerprint. If no administrator has been setup the menu is displayed automatically. •The menu screen displays: •Scroll down to the ‘Pendrive’ menu option using the downward arrow keys on the clock and then press ‘OK’
•Two options display. The ‘Download’ option is highlighted as default. Select this by pressing ‘OK’
Pic – TFTPendriveMenu (Hamish)
•Select the ‘Download Attlog’ option and Press ‘Ok’ •The download then starts showing a progress bar as the download proceeds. •When complete Press ‘OK’, then •Press ‘ESC’ 3 times to return to the home screen. •The file downloaded to the USB is called ‘attlog.dat’ •This file should be stored in a safe place either on the USB or elsewhere. |
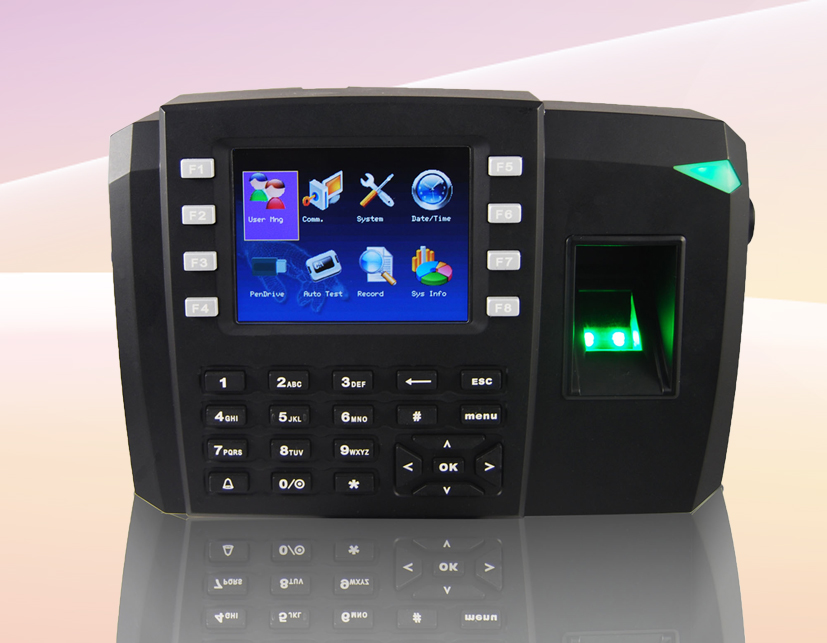
![]() Backup Transaction data to USB - TFT600 Mk2
Backup Transaction data to USB - TFT600 Mk2
Some TFT600 terminals have updated firmware that work slightly differently. In these cases: Press on the ‘Menu’ button on the terminal
•If an Administrator has been setup the administrator needs to unlock the menu using their fingerprint. If no administrator has been setup the menu is displayed automatically. •The menu screen displays:
•Scroll down to the ‘USB Manager’ menu option using the downward arrow keys on the clock and then press ‘OK’ •The ‘Download’ option is highlighted as default. Select this by pressing ‘OK’
•Select the ‘Attendance Data’ option and Press ‘Ok’ •The download then starts showing a progress bar as the download proceeds. •When complete Press ‘OK’, then •Press ‘ESC’ 3 times to return to the home screen. •The file downloaded to the USB is called ‘attlog.dat’ •This file should be stored in a safe place either on the USB or elsewhere. |
![]() Backup Transaction data to USB - FA5
Backup Transaction data to USB - FA5
To start the backup place a USB flashdrive in the USB port located on the left hand side of the terminal. Then press the ‘Menu’ button on the terminal until the menu displays. The menu displays immediately if no administrator is assigned to the terminal.
•If an Administrator has been setup the administrator needs to unlock the menu using facial recognition. •The menu screen displays:
•Several options display.
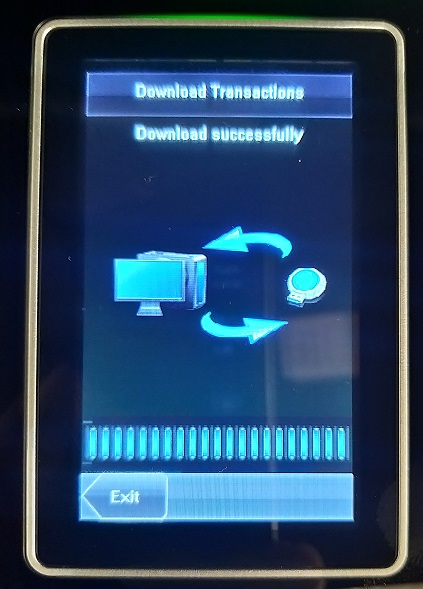
•Select 'Download Transactions'
•The download then starts showing a progress bar as the download proceeds. •When complete Press ‘Exit'. |
![]() Backup Transaction data to USB - FA1
Backup Transaction data to USB - FA1
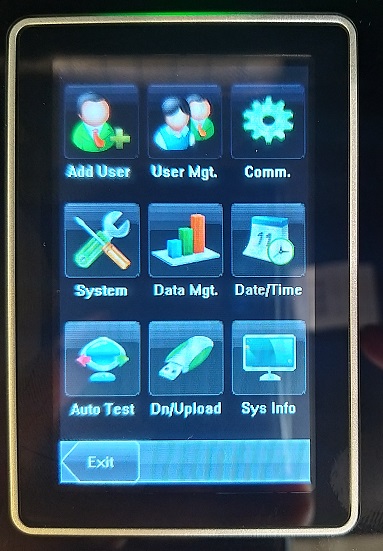
FA1 Press the menu button on the top left-hand side of the screen. The menu displays immediately if no administrator is assigned to the terminal.
•If an Administrator has been setup the administrator needs to unlock the menu using either their facial or fingerprint input. •The menu screen displays: •Click on ‘Dn/ Upload’ menu option. •Several options display. Click on the ‘Download Transaction’ option. •The download then starts showing a progress bar as the download proceeds. •When complete Press ‘OK’, then •Press the ‘Menu’ button on the top left hand side of the screen to return to the main menu, then press ‘Exit’ to exit the menu screen. •The file downloaded to the USB is called ‘attlog.dat’ •This file should be stored in a safe place either on the USB or elsewhere.
|
When transactions are downloaded/ synchronized from Terminals over the network it forms what is effectively a backup of data. This is covered in the Getting Started section of this manual.
To backup a list of Users incl. fingerprints/ facial data. This process differs slightly between the types of terminal being used in the system. Start by inserting a USB drive into the USB slot on the terminal.
![]() Backup List of Users incl. fingerprints/ facial data - TFT500 and TFT600 Mk1
Backup List of Users incl. fingerprints/ facial data - TFT500 and TFT600 Mk1
Press on the ‘Menu’ button on the terminal
•If an Administrator has been setup the administrator needs to unlock the menu using their fingerprint. If no administrator has been setup the menu is displayed automatically. •The menu screen displays:
•Scroll down to the ‘Pendrive’ menu option using the downward arrow keys on the clock and then press ‘OK’ •Two options display. The ‘Download’ option is highlighted. Select this by pressing ‘OK’ •Select the ‘Download Users’ option and Press ‘Ok’ •The download then starts showing a progress bar as the download proceeds. •When complete Press ‘OK’, then •Press ‘ESC’ 3 times to return to the home screen. •There are 2 files that are downloaded to the USB one is called ‘User.dat’ which contains the User names and the other is called ‘Template.fp10.1’ which contains the fingerprint records. •These files should be stored in a safe place either on the USB or elsewhere.
The original data remains on the terminal until such time as it is deleted.
|

![]() Backup List of Users incl. fingerprints/ facial data - TFT600 Mk2
Backup List of Users incl. fingerprints/ facial data - TFT600 Mk2
The options for the Mk2 are similar to that of the Mk1, detailed above.
Press on the ‘Menu’ button on the terminal
Pic – TFT600 - Enter and Menu KeyMk2
•If an Administrator has been setup the administrator needs to unlock the menu using their fingerprint. If no administrator has been setup the menu is displayed automatically. •The menu screen displays:
Pic - TFT600 - Main Menu Screen
•Scroll down to the ‘USB Manager’ menu option using the downward arrow keys on the clock and then press ‘OK’
Pic - TFT600 - Navigation & Enter Key
•Three options display. The ‘Download’ option is highlighted. Select this by pressing ‘OK’
Pic – TFT600Mk2DownloadMenu (Hamish)
•Scroll down to the ‘User Data’ option and Press ‘Ok’ •The download then starts showing a progress bar as the download proceeds. •When complete Press ‘OK’, then •Press ‘ESC’ 3 times to return to the home screen. •There are 3 files that are downloaded to the USB one is called ‘User.dat’ which contains the User names, the second and third files are called ‘template.fp10.1’ and ‘template.fp10’ which contain the fingerprint records. •These files should be stored in a safe place either on the USB or elsewhere.
The original data remains on the terminal until such time as it is deleted. |
![]() Backup List of Users incl. fingerprints/ facial data - FA5
Backup List of Users incl. fingerprints/ facial data - FA5
Press and hold the ‘Menu’ button on the terminal.
Pic – FA5 - Menu button and number pad
•If an Administrator has been setup the administrator needs to unlock the menu using their fingerprint. If no administrator has been setup the menu is displayed automatically. •The menu screen displays:
Pic - FA5 - Main Menu Screen
•Scroll down to the ‘Data Mgt’ menu option using the downward arrow keys on the clock and then press ‘OK’
Pic - FA5 - Menu button and number pad •Several options display. Scroll down to the ‘Download User’ option. Select this by pressing ‘OK’ •The download then starts showing a progress bar as the download proceeds. •When complete Press ‘OK’, then •Press ‘ESC’ twice to return to the home screen. •There are 4 files that are downloaded to the USB one is called ‘User.dat’ which contains the User names, the second and third files are called ‘template.fp10.1’ and ‘template.fp10’ which contain the fingerprint records. The fourth file is called ‘department.dat’ which contains departmental details. •These files should be stored in a safe place either on the USB or elsewhere.
The original data remains on the terminal until such time as it is deleted.
|
![]() Backup List of Users incl. fingerprints/ facial data - FA1
Backup List of Users incl. fingerprints/ facial data - FA1
Press the menu button on the top left-hand side of the screen. The menu displays immediately if no administrator is assigned to the terminal.
Pic – FA1 - Enter and Menu Key
•If an Administrator has been setup the administrator needs to unlock the menu using either their facial or fingerprint input. •The menu screen displays:
Pic – FA1 - Main Menu Screen
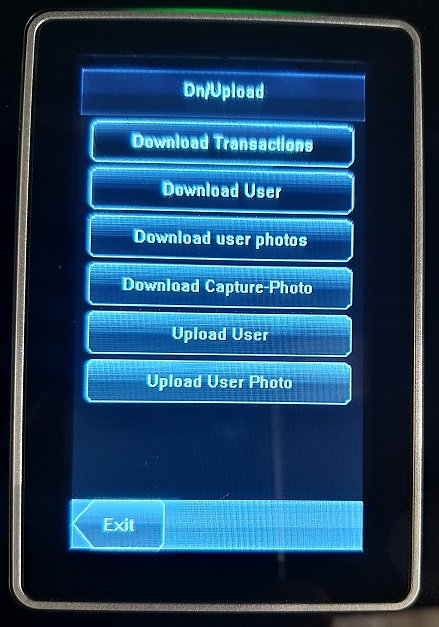
•Click on ‘Dn/ Upload’ menu option.
Pic – FA1 - DownloadUploadMenu
•Several options display. Click on the ‘Download User’ option.
Pic – FA1 – DownloadTransactions (Hamish)
•The download then starts showing a progress bar as the download proceeds. •When complete Press ‘OK’, then •Press the ‘Menu’ button on the top left-hand side of the screen to return to the main menu, then press ‘Exit’ to exit the menu screen. •There are 3 files that are downloaded to the USB one is called ‘User.dat’ which contains the User names, the second and third files are called ‘template.fp10.1’ and ‘template.fp10’ which contain the fingerprint and facial records. •These files should be stored in a safe place either on the USB or elsewhere. • |
In most situations the terminal is linked to the Belina Time Control Module by ethernet or Wireless network connection. Data may be being downloaded (polled) at specified time intervals. When this happens the transaction data is copied from the terminal to the Belina Time Control Module and saved in the SQL database. This is a form of backup for the terminal data. Of course the SQL database itself is backed up whenever a backup is taken in the Belina system.
The original data remains on the terminal until such time as it is deleted.
Name and Fingerprint Data
Downloading user fingerprints and attendance log onto flash drive.