To enable the Belina Payroll Module to work with the Belina Connect cloud based services several setup procedures need to be followed:
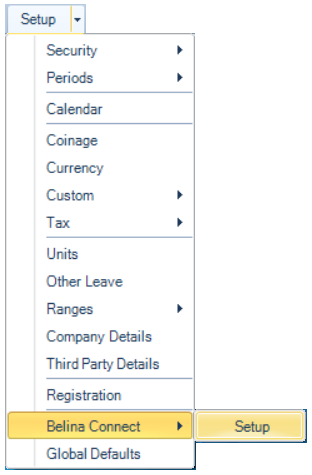
First go to the 'Setup', 'Belina Connect', then select the 'Setup' options:
Settings
The 'Setting's tab is open, by default.
A preliminary procedure before we get to this point is to have a file, that contains unique connection settings sent to you by email. This file is generated specifically for your organization and enable your system to connect to the Belina cloud server. Once it has been sent to you download the file to your computer. Then press the elipsis button against 'Browse settings file' to lookup the file.
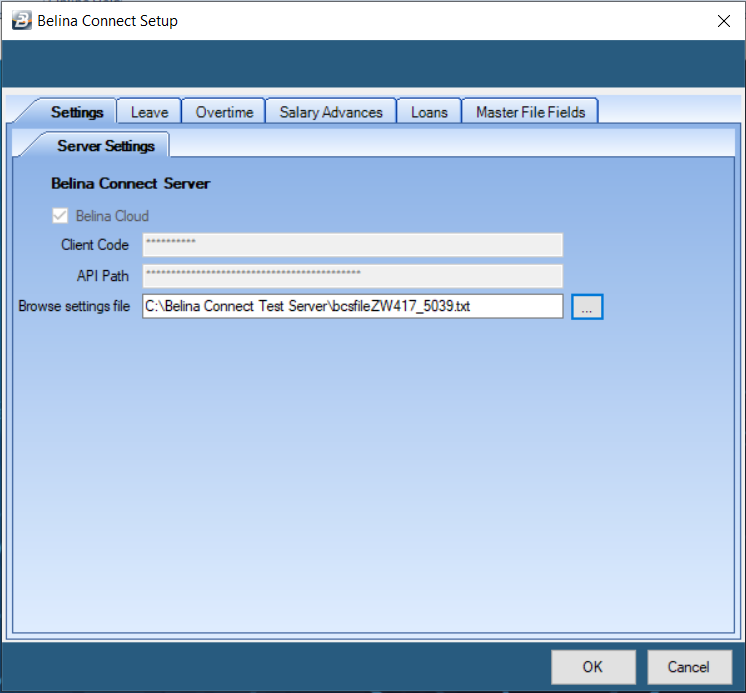
At this point press the 'OK' button, which will save the file. We would then go to synchronize the payroll to the cloud, establishing its first connection, and ensuring that the connection is working properly. Once this has been done we can come back to the second 'Leave' tab to continue the setup.
Leave
This table shows all the different possible leave types. Select each leave type that you use in your payroll and press the elipsis button.
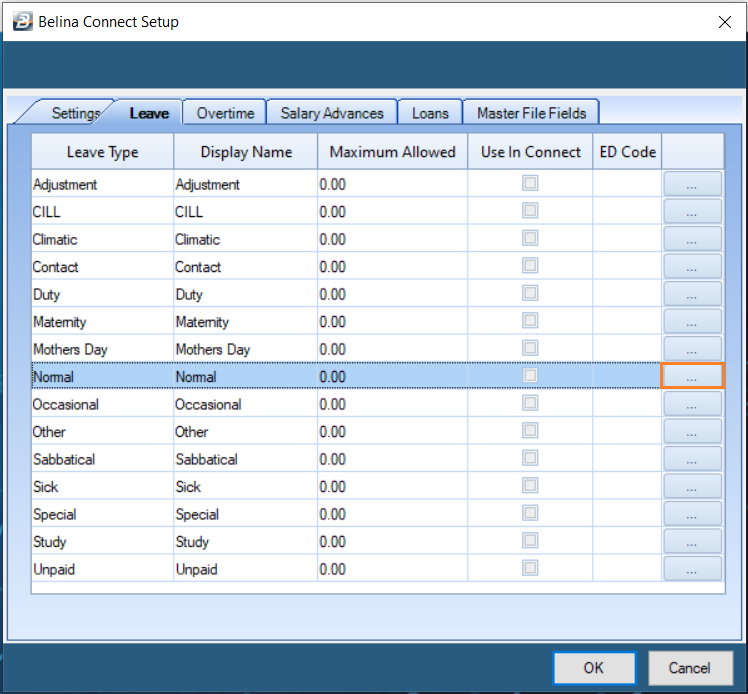
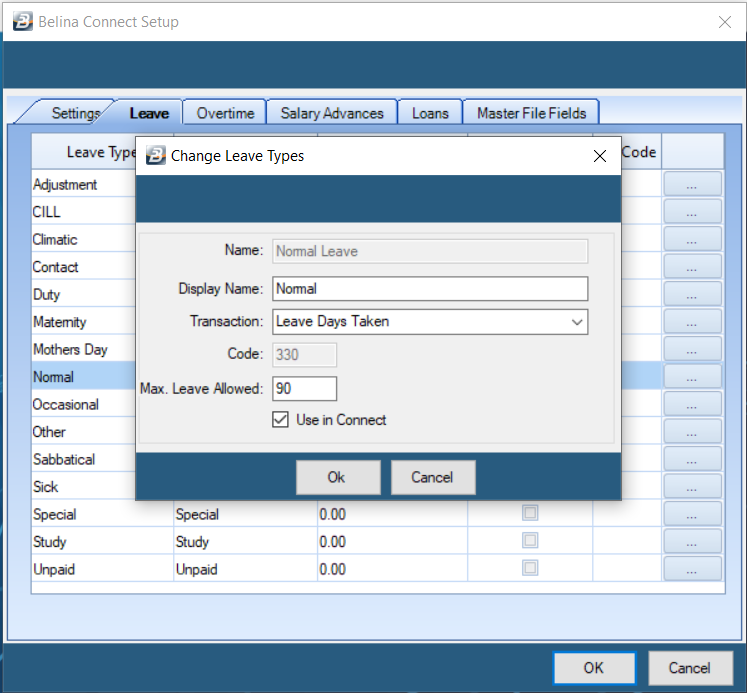
We use Normal leave as an example. Once the elipsis button has been pressed you can setup the parameters that pertain to that leave type, as follows:
First press the down arrow against 'Transaction' and select 'Leave Days Taken'
Secondly enter the 'Max. Leave Allowed' for that type of leave.
Thirdly place a tick against 'Use in Connect' if this leave transaction is to be used by the Connect Module.
Overtime
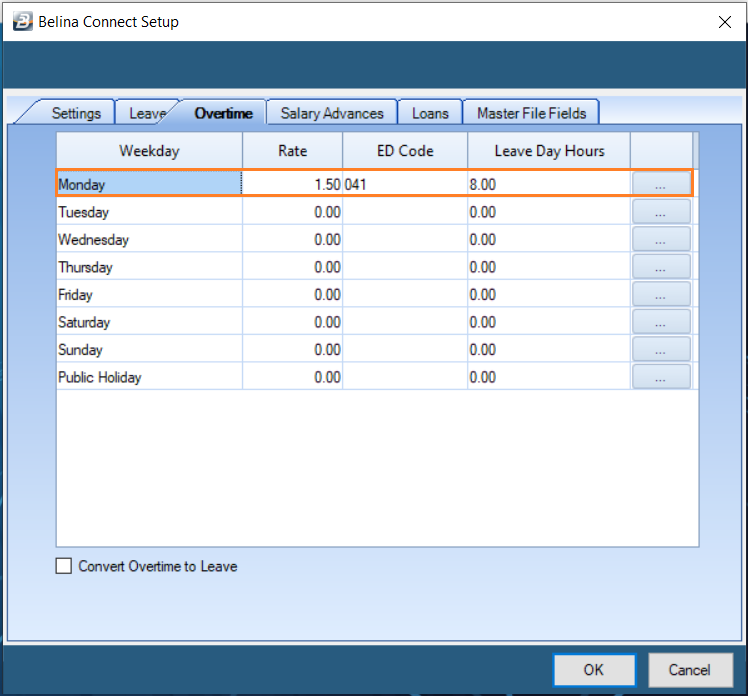
This table shows the overtime rates that apply for overtime worked on each day of the week, as well as for public holidays. It assists in the importation of overtime applications. Using this information the system can allocate the hours worked to the correct overtime code.
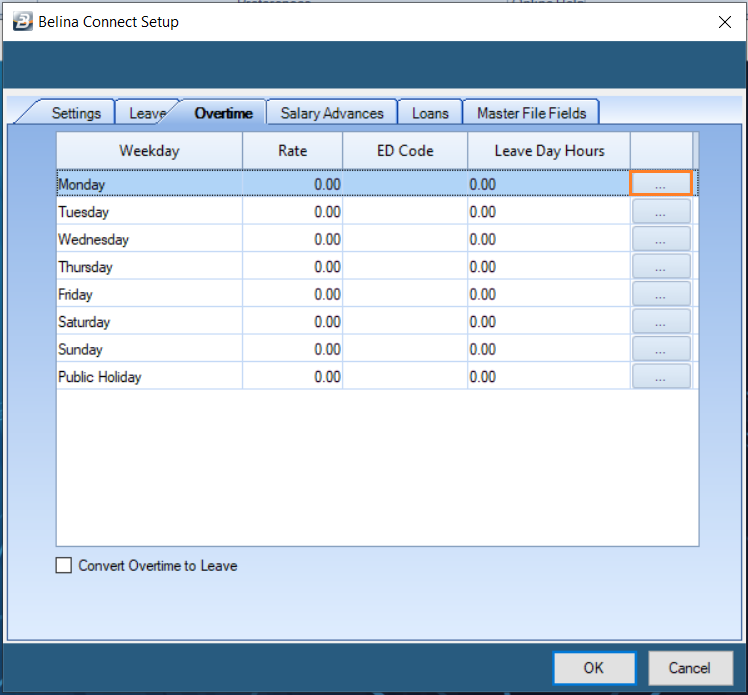
Use the elipsis button to enter the parameters that apply to each weekday and public holiday. Specify the Transaction Code to be used using the dropdown menu. Then also enter the number of hours that make up a leave day to assist in the conversion of overtime to leave, should that appy.
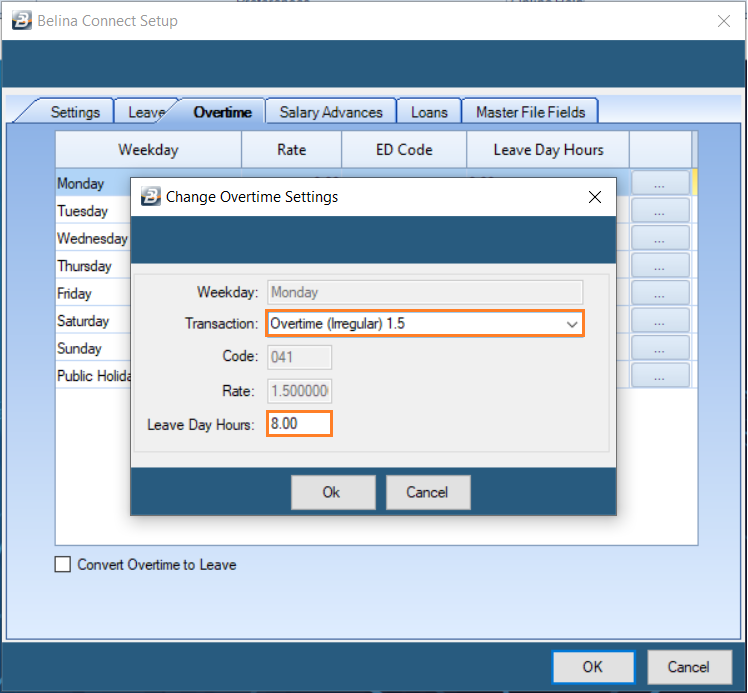
The information entered is then displayed on the table.
Salary Advances
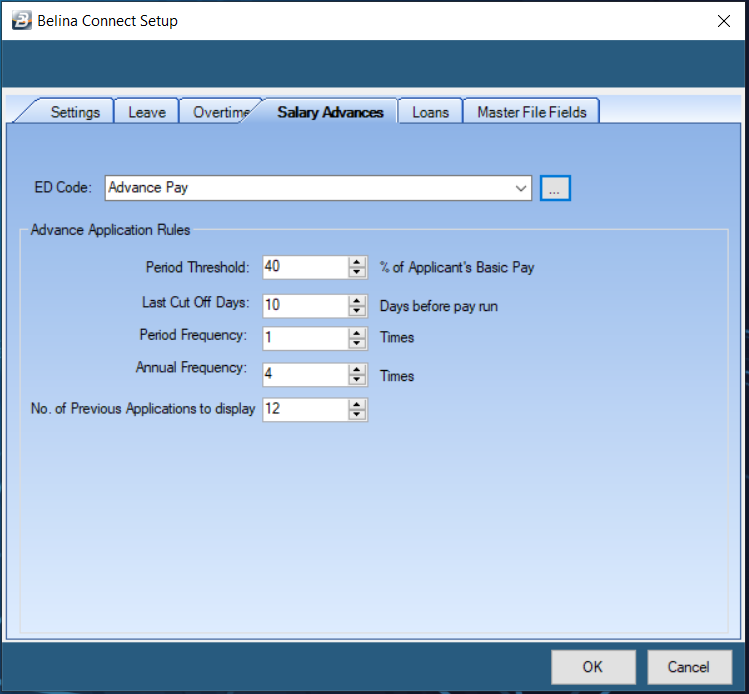
In some cases you may wish to give salary advances instead of staff loans.
If this is the case:
•use the dropdown men to select the Transaction Code ('Ed Code') that is used for recording Salary Advances in the Payroll Module.
•Then enter the rules that apply to any advances given.
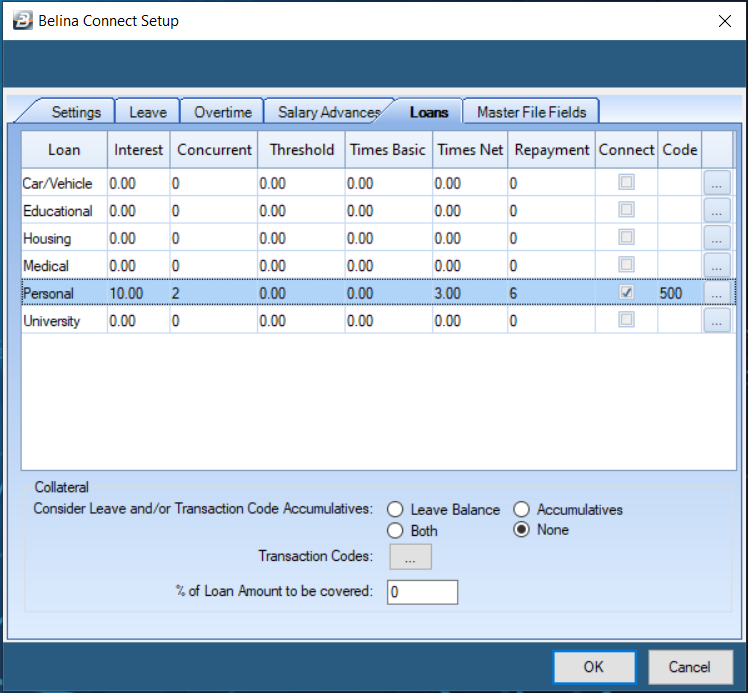
Loans
Use the loans tab to enter the parameters that are to apply to various categories of loan type. To do this press the elipsis button against the loan type being setup. In this example we will press the elipsis button against 'Personal' loans:
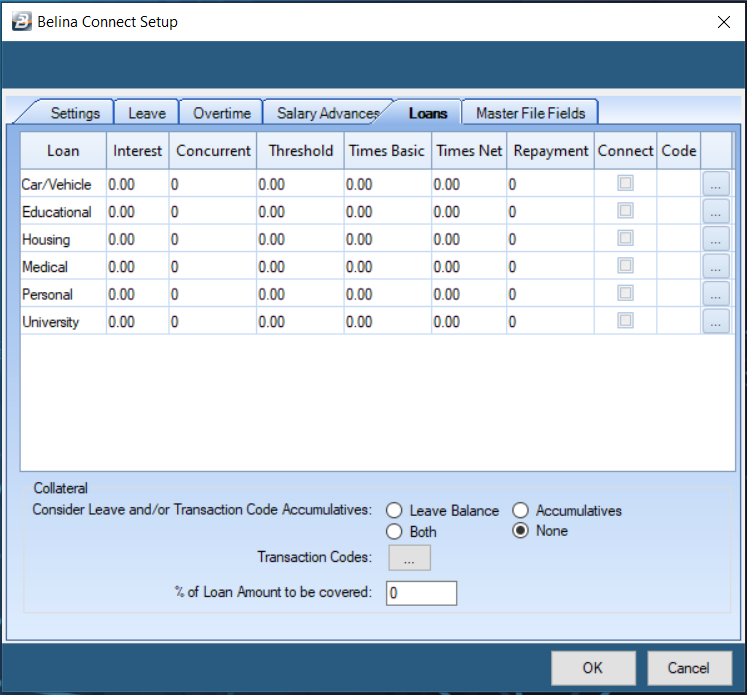
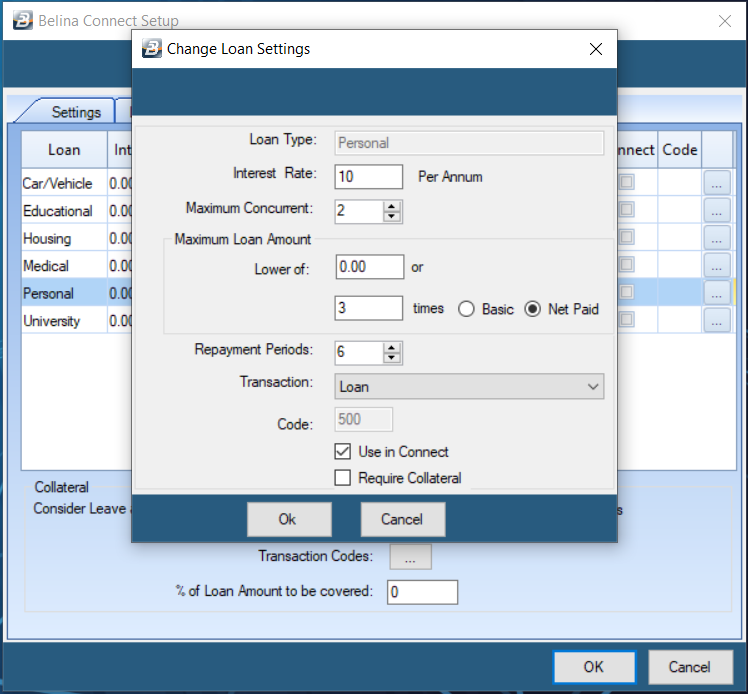
Enter the parameters that apply to the loan type:
•The interest rate per annum
•The maximum number of concurrent loans (of any type)
•The maximum loan amount for the personal loan, as the lower of specified amount or a factor of the Basic or Net Paid amount.
•The maximum number of repayment periods
•Use the dropdown menu to select the Transaction Code used for processing Personal Loans
•Tick 'Use in Connect' checkbox to enable employees to apply for loans using the Connect Module.
•Tick 'Require Collateral' to enforce a control to ensure that collateral has been obtained.
Once these parameters have been entered the details are displayed on the table, as shown below:
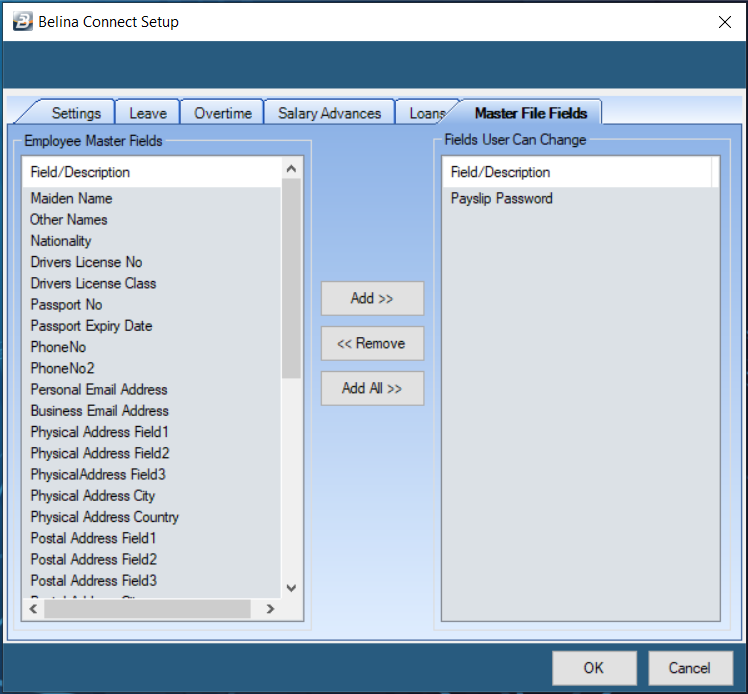
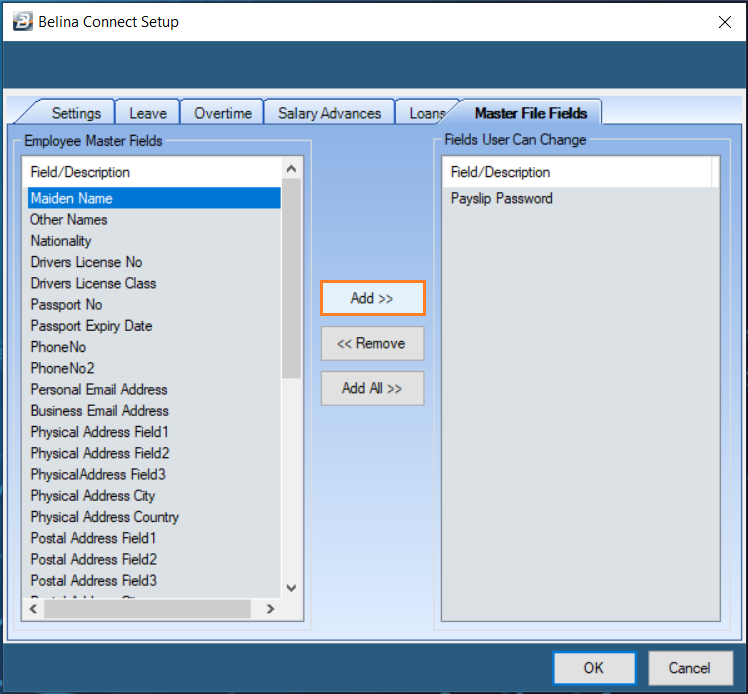
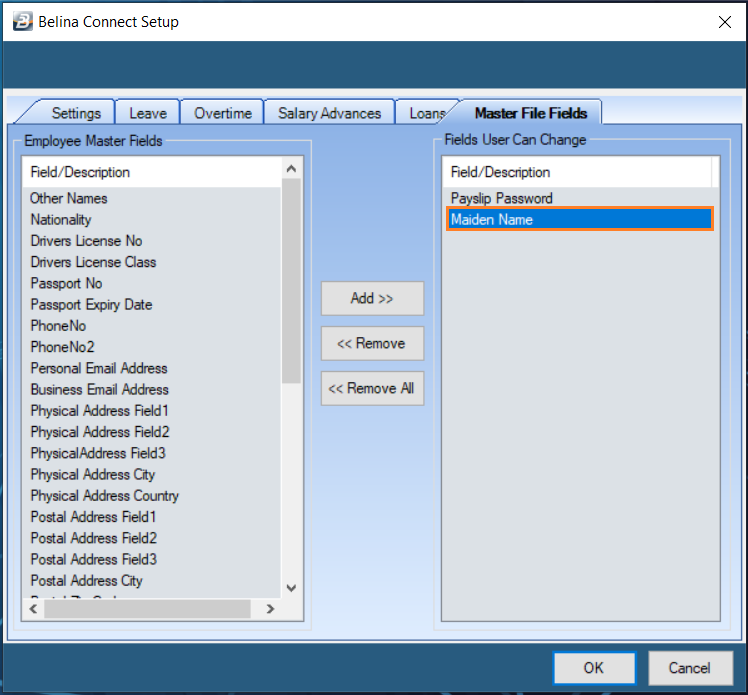
Masterfield Changes
In the left hand panel notice a list of Employee Master Fields that are available to be changed by employees through the Connect Module.
To select fields that can be changed highlight the field in the left hand panel and press the 'Add>>' button. The field is then added to the list of 'Fields User Can Change' in the right hand panel. Careful consideration should be given to the type of fields that employees can change. Please also note that when an employee makes a change to the data stored in a field that change goes through to the Administrator who would then need to approve the change before it goes through into the Employee Master record.