Work Codes' can be used to represent Cost Codes or Job Cost Codes. Employee clocking times allocated to these Cost Codes can be used to produce reports detailing the amount, and value, of that time.
Clocked times may be allocated to Work Code/s to enable the reporting of labour hours and cost to that Work Code. Create Work Codes in the Belina Time Control Module and then Upload them to the Terminal/s. This saves time uploading the codes on the terminals themselves.
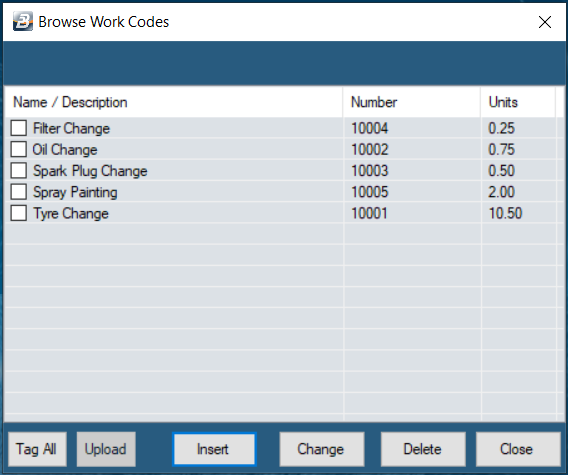
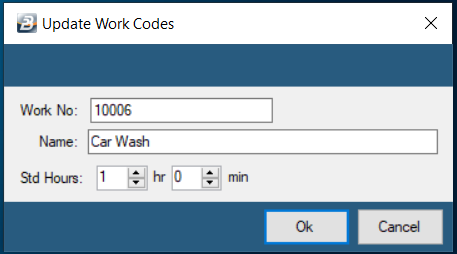
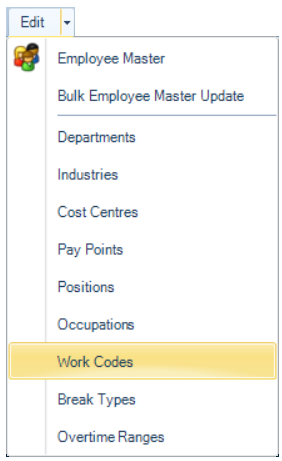
To Create a Work Code: •Go to the 'Edit', then 'Work Codes' menu options
•Press 'Insert' to add a new 'Work Code' •Enter the 'Work No.' and the 'Name' of the Work Code
•Enter the Standard Hours (These are the Standard Hours for that Job, used where there is a standard hours for the completion of a particular job or process. This works in conjunction with the ‘Productivity Per Job’ Report [Provide link] which compares the time that the employee has worked on a job or task compared to the standard hours allocated for this process.
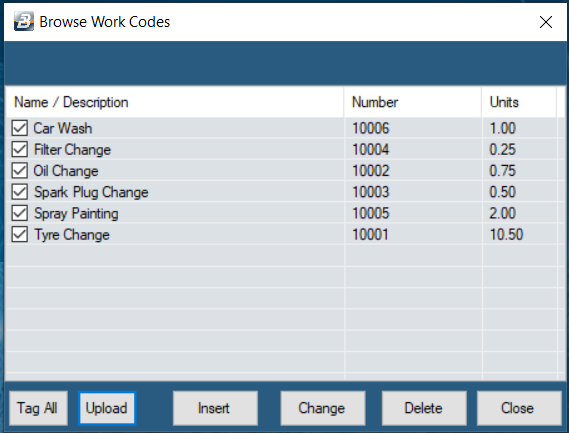
To transfer Work Codes to the terminals: •Tick the Check-boxes on each of the Work Codes to be uploaded, then
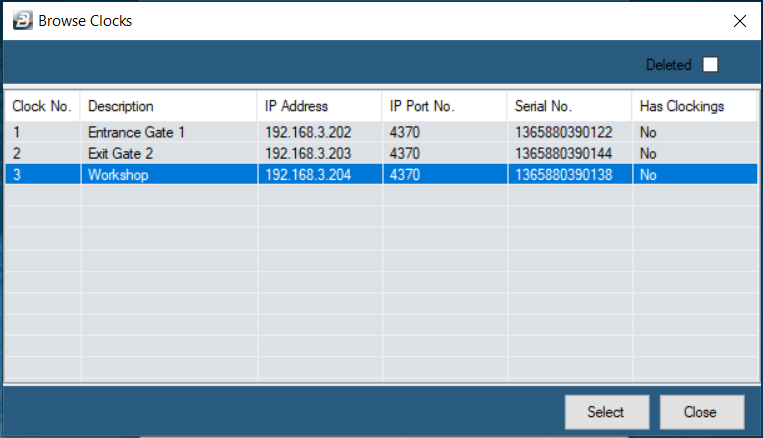
•Press 'Upload' •In the next screen 'Select' the terminal to be uploaded
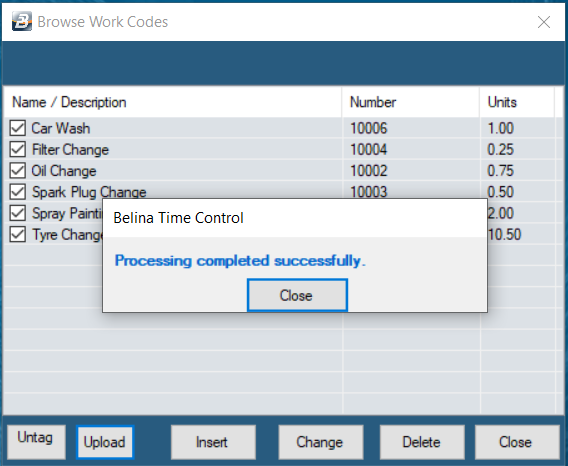
•Once this is done the terminal will receive the Work Codes sent.
|

![]() Clocking in and out of Jobs - TFT500 and TFT600
Clocking in and out of Jobs - TFT500 and TFT600
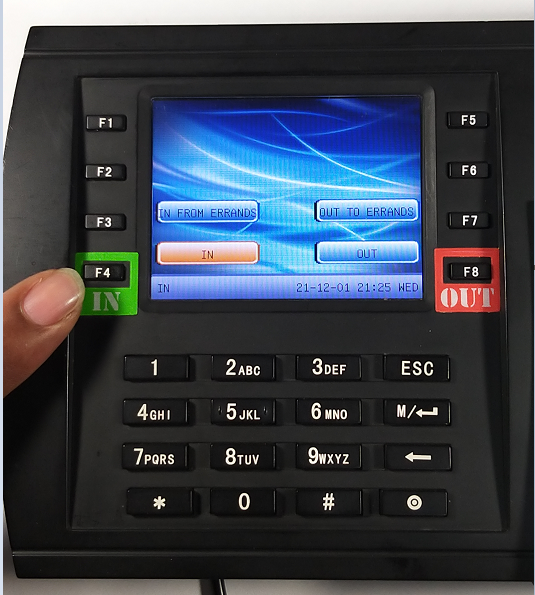
The procedure to check into a job is as follows: Press the F4 button which is normally allocated as the ‘Check-In’ button
Then Press the ‘*’ on the Keypad
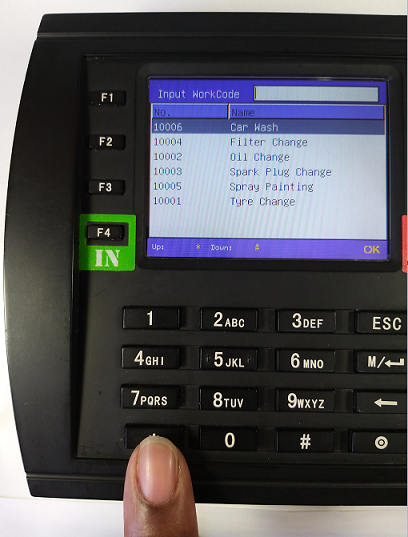
A search window displays. Type in the Work Code Number or use the arrow keys to select the work code displaying on the screen then
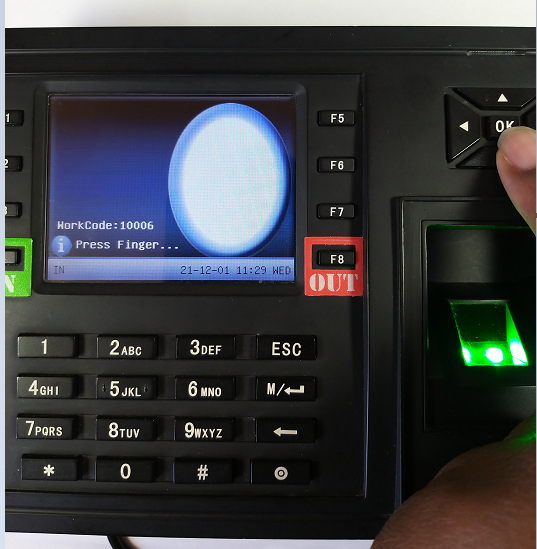
Press ‘OK’ to select the code The employee then uses their fingerprint to check into a job
Once successful the terminal registers the fingerprint and says ‘Thank You’ It is important to check out of a job once work has stopped on that particular job. This should be done in every instance but particularly before checking into another job. The procedure to check out of a job is the same as the one on checkin the job the only difference is that this time you click on the F8 button Check Out.
Please follow the next steps:
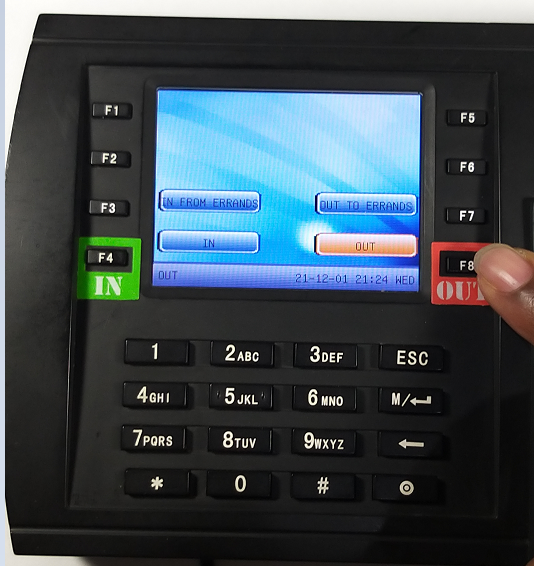
Press the ‘*’ on the Keypad A search window displays Type in the Work Code Number that you checked into earlier on then Press ‘OK’ to select the code when it has displayed on the screen Press the F8 button which is normally allocated as the ‘Check-Out’ button The employee then uses their fingerprint to check out of the job Once successful the terminal registers the fingerprint and says ‘Thank You’ The terminal will record the time in and the time out of the job. When the times are downloaded to the Belina Software the amount of time spent on the job will be automatically calculated and added to any other times spent on that job. |

The downloading of Work Code transactions can be done any number of times during a period. This is normally done at the end of each day.
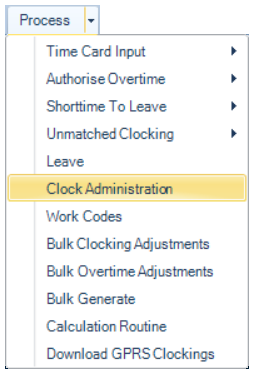
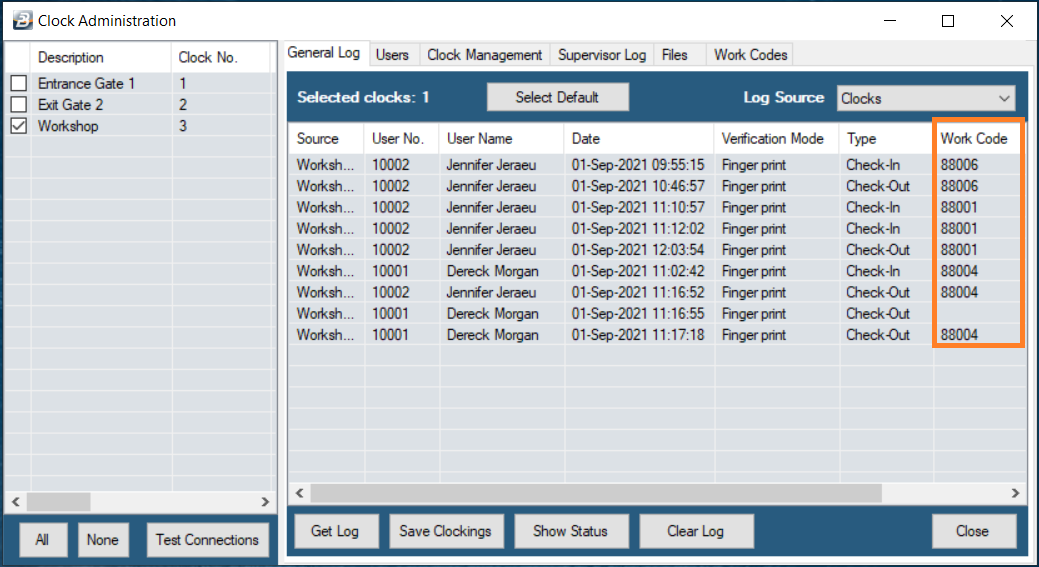
To download Work Code transactions: Go to the ‘Process’, then ‘Clock Administration’ menu options,
Select the Clock/s that is/are being used to capture Work Code (Job) times Press the ‘Get Log’ button The system will then automatically download the Work Code data and display the detailed transactions. |
![]() Deleting Work Codes on the software and Terminal/s
Deleting Work Codes on the software and Terminal/s
This is best done from the Time Control Module. To do this: Go to the ‘Edit’, then ‘Work Codes’ menu option,
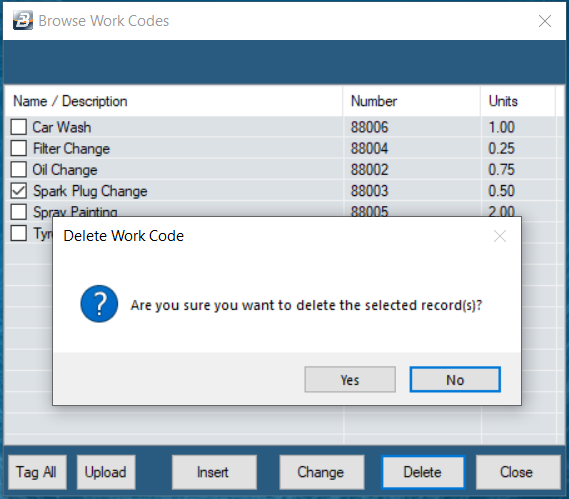
Select the Work Codes to be deleted by placing a tick in each of the checkboxes required, once selected Press ‘Delete’ A warning message displays. Press ‘Yes’ to continue to delete the Work Code/s or ‘No’ to abort the deletion.
Highlight the clock from which the Work Code/s are to be deleted, Press ‘Select’ The software will then connect to the clock selected and delete the Work Code/s. Note: Whilst a Work Code may not be currently required the record may be needed for future reference by auditors and other interested persons. |

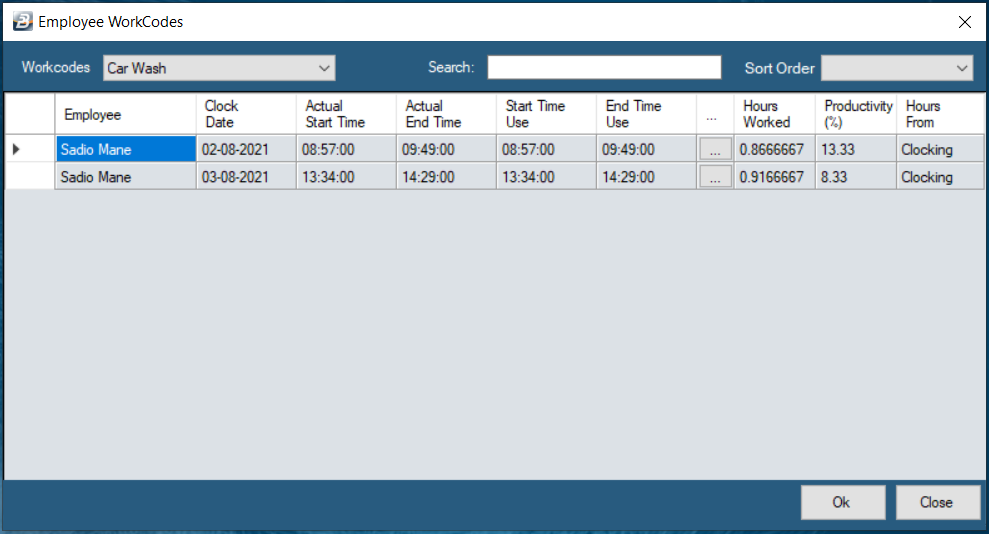
![]() Processing Work Code Transactions
Processing Work Code Transactions
Work Code Transactions are recorded on the terminals as employees clock into different Work Codes/ Jobs. These transactions are then downloaded to the Time Control Module software.
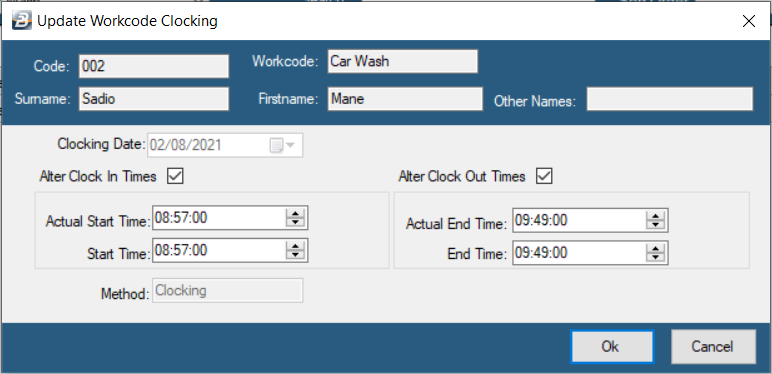
Highlight the employee that needs adjustment and press the elipsis button to effect changes.
If adjustments need to be made to these transactions then use the ellipsis buttons against the fields to be changed.
When complete press the ‘OK’ button. |