Timesheets are a way in which hours can be allocated to different cost centres/ funders/ work codes. In order to use timesheets take the following steps:
![]() Enabling Timesheets in Connect Global
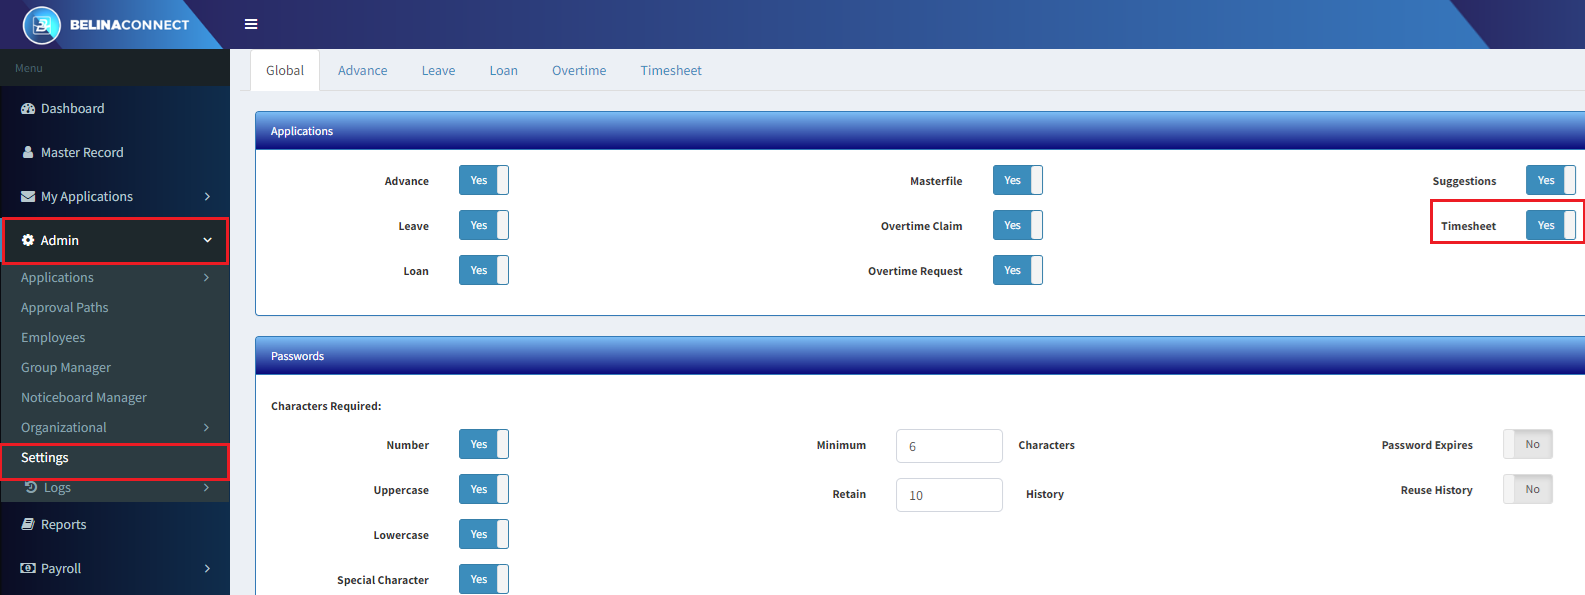
Enabling Timesheets in Connect Global
To Use Timesheets on Belina Connect, you need to firstly enable the Timesheets option. To do this: - In the left hand panel click on ‘Admin’ then the ‘Settings’ menu options. - In the 'Global' tab that opens click on the ‘Timesheet’ option, on the right hand side of the screen, to enable the option.
|
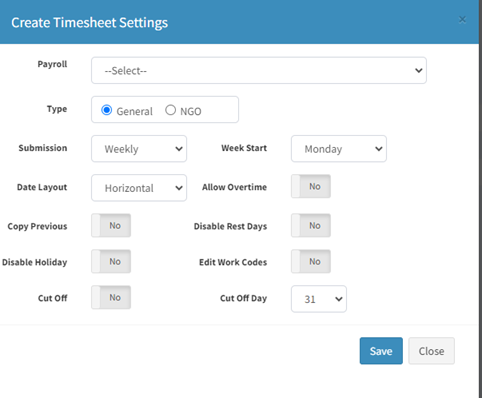
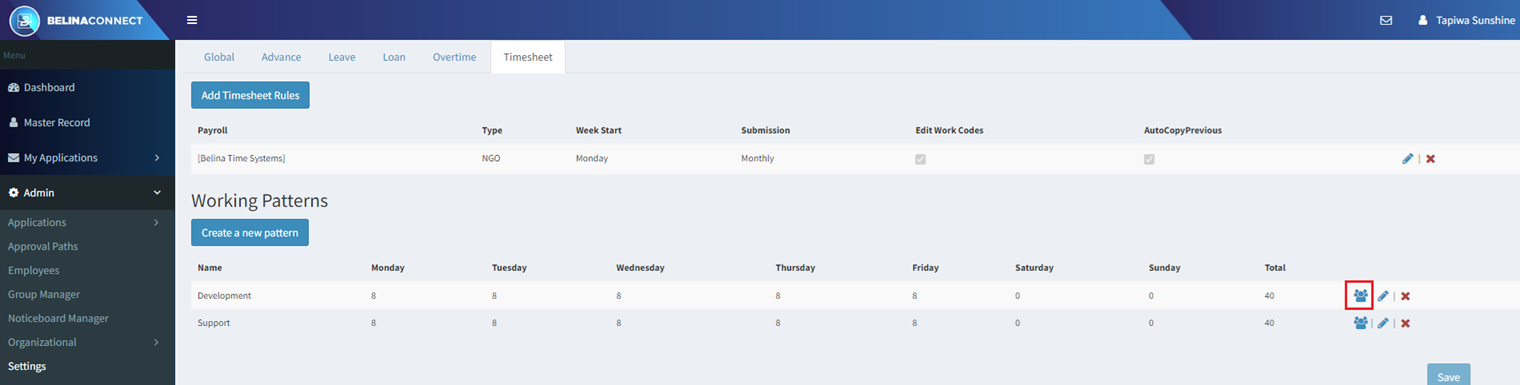
- now select the 'Timesheet' tab - Click the button 'Add Timesheet Rules'.
- Use the 'Payroll' drop-down menu option to select the Payroll that the Timesheet will be applicable to - Use the radio button to select whether your organization is an 'NGO', or not, by selecting 'General' - Select from the 'Submission' drop-down the time intervals in which the Timesheet is submitted. The options are 'Weekly', 'Bi-monthly' and 'Monthly' - For 'Bimonthly' timesheets click the drop-down menu against Week Start' to select the first day of the bimonthly period. - For 'Monthly' timesheets click the drop-down menu against Week Start' to select either a Calender date for the first day of the monthly period, or select the 'Pay Period' option which will then use the pay period dates in the Payroll. - For Weekly timesheets click the drop-down menu against 'Week Start' to select the day first day of the business week. - Use the 'Date Layout' dropdown to select whether dates are to be listed vertically down the screen, or horizontally across the screen. - Click the 'Overtime' button to enable the entry of overtime hours, if applicable. - Click the 'Copy Previous' button to enable the copying across of information from the previous period Timesheet into the current one. - Click the 'Disable Rest Days' button to disable the entry of times on days regarded as rest days. This could be weekends, or any day regarded as a rest day by the organization. - Click the 'Disable Holiday' button to disable the entry of information on Timesheets for days regarded as holidays - Click the 'Edit Work Codes' button to allows users to edit work codes. - Click the 'Cut off' button to enable the entry of a cut off date for Timesheets submission - If there is a date cut off, then click 'Cut Off Day', the last day on which submissions are accepted for the period. This is normally the payroll cut off day. - Press 'Save' to save the settings. |
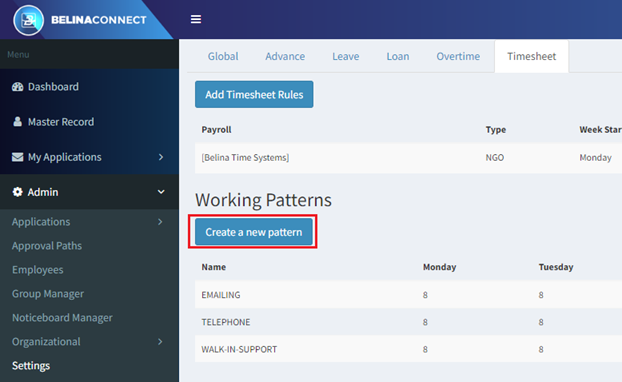
Having set the general timesheet settings we now setup Working Patterns, for example one group working an 7am - 4pm shift whilst another working a 8am - 5pm shift. To do this setup: - First create a Work Pattern. If this does not exist press the 'Create a new pattern' button
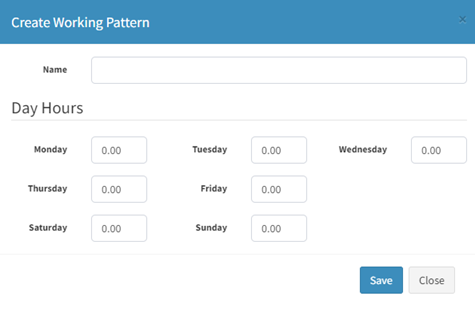
The following screen appears:
- Enter the name of the 'Working Pattern' eg. 'Day Shift' or 'Night Shift' - Enter the maximum number of hours that employees work on each of the days. - Press 'Save' to save the changes. |
It is then necessary to assign these working patterns to employees, to do this: - Click on the 'Select Employees' icon on the right hand side as shown below:
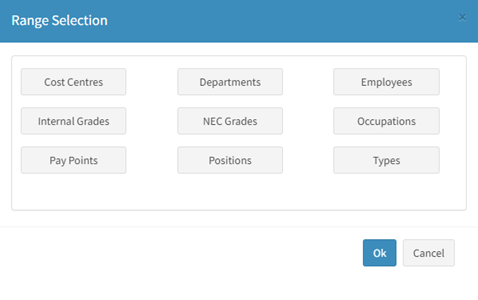
We are now going to apply the work patterns to a range of employee - Select the 'Range Selection' option that you want to choose employees with. - Then click on 'Ok' to save
|
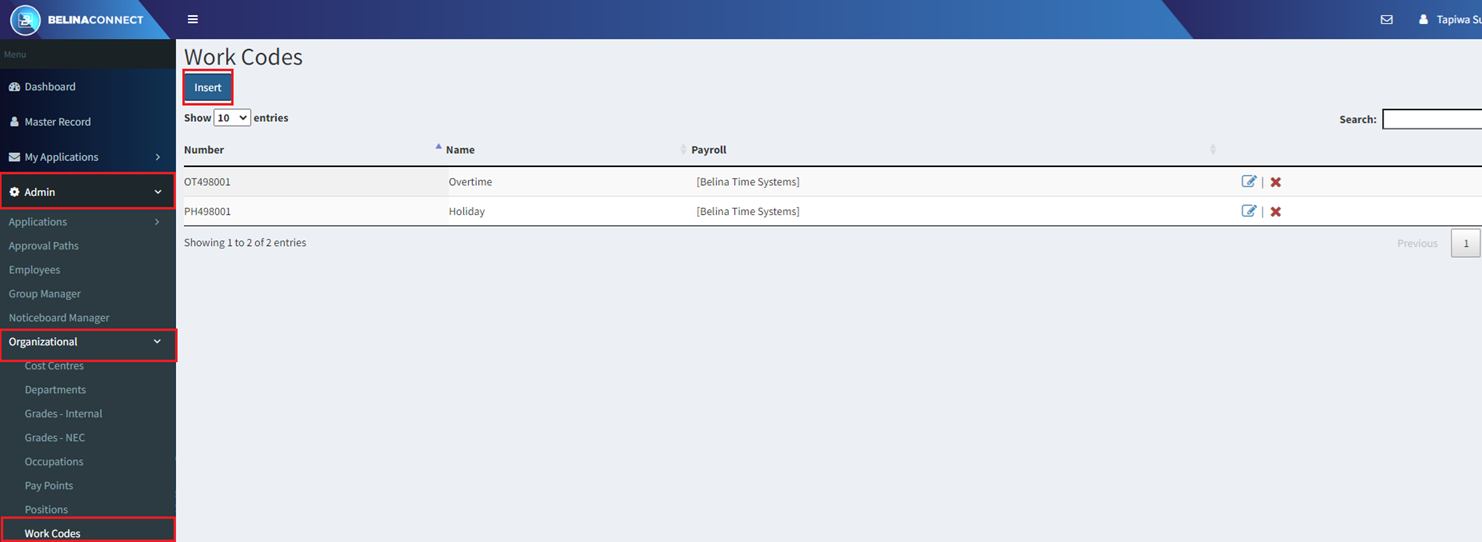
Work codes are the task that employees do on a daily basis being guided by the time they do these tasks (Work Patterns).
To set Work codes: - Click on 'Admin' then 'Organizational' - Then select 'Work codes' - Click 'Insert' to create the work codes
NB: For the administrator to be able to use the Timesheets, there is need to set them in the approval paths |
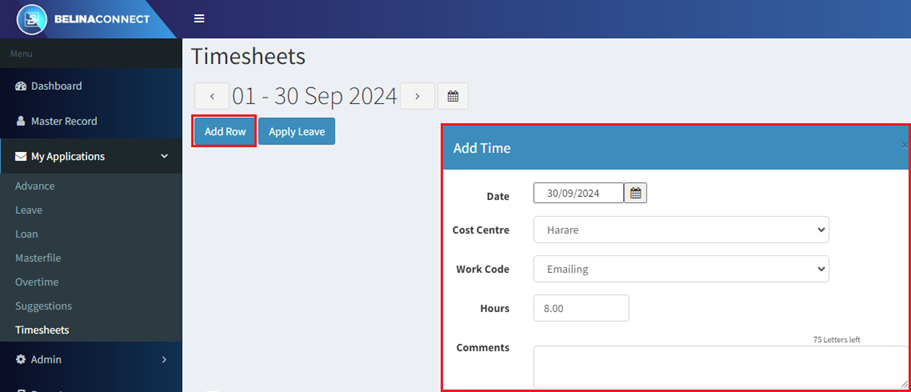
Once the setup has been done by the administrator it is then possible for the Connect users to populate their Timesheets online.
To do this the employee would: - Click on 'My Applications' - Select the menu option 'Timehseet' - Click 'Add Row' - Enter the 'Date', 'Cost Centre', 'Work Code', 'Hours', then add a 'Comment'
|